Web Technology Lab
Web Technology lab
Quick Links
- Experiment 1
- Experiment 2
- Experiment 3
- Experiment 4
- Experiment 5
- Experiment 6
- Experiment 7
- Experiment 8
- Experiment 9
- Experiment 10
Theory:
<!DOCTYPE html>
<html lang="en">
<head>
<meta charset="UTF-8">
<meta name="author" content="prince kunal">
<meta name="viewport" content="width=device-width, initial-scale=1.0">
<title>IEC College</title>
</head>
<body>
<img src="image.png" width="600px" alt="logo" />
<br />
<h1>IEC COLLEGE OF ENGINEERING AND TECHNOLOGY</h1>
<p style="text-align: center;">Greater Noida</p>
<hr>
<a href="#">
<h1>BTECH</h1>
</a>
<a href="#">
<h1>MTECH</h1>
</a>
<a href="#">
<h1>BPHARMA</h1>
</a>
<a href="#">
<h1>MBA</h1>
</a>
<hr>
<h2>BTECH</h2>
IEC College of Engineering offers B. Tech degrees in several engineering
streams including Computer Science, Information Technology, Electronic and
Communication, Electrical, Mechanical and Civil Engineering. The duration of
the B. Tech programme is a minimum of 4 years (8 semesters).<br><br>
The IEC B. Tech curriculum is highly flexible with students, having the option
to choose from a wide range of elective courses and open electives. Minor
specialization will be decided based on the electives chosen by each student.
<br><br> Engineering Programs List Of Engineering Courses There are 6 programmes
available under IEC Engineering College at B. Tech level. Students can choose
from the following list of engineering courses: <br><br>
<a href="#">Mechenical Engineering (ME) </a><br />
<a href="#">Electronics & Communication Engineering (ECE)</a><br />
<a href="#">Electrical Engineering (EE)</a><br />
<a href="#">Computer Science and Engineering (CSE)</a><br />
<a href="#">Civil Engineering (CE) </a><br />
<a href="#">Information Technology (IT) </a><br />
<hr>
<h2>MTECH</h2>
IEC Group Of Institutions offers the following M.Tech Courses:
<br><br>
<a href="#">M.Tech Power Systems</a><br />
<a href="#">M.Tech Computer Science</a><br />
<a href="#">M.Tech Mechanical Engineering</a><br />
<a href="#">M.Tech Civil Engineering</a><br />
<a href="#">M.Tech Electronics & Communication Engineering</a><br />
<h3>ELIGIBLITY</h3>
Candidates should have passed B.Tech. or equivalent from an AICTE approved
Institution or Institutions of National Importance with minimum 60% marks in
case of General/OBC candidates and 55% in case of SC/ST candidates.
<br><br>
1. Candidates possessing valid GATE score shall be given preference over to
those applicants who do not possess GATE score.
<br><br>
2. For admission to M.Tech. (Electronics Engineering and related branches),
candidates having degree of B.Tech. in Electronics Engineering/Electronics and
Communication Engineering/Electronics and Instrumentation Engineering/M.Sc
(Electronics Engineering) or equivalent degree in related discipline with at
least 60% marks for General/OBC category and 55% marks for SC/ST category are
eligible. <br><br>
3. B.Tech. in Electrical Engineering/ Electronics and Electrical Engineering/
Electrical and Instrumentation Engineering or equivalent degree in related
discipline with at least 60% marks for General/OBC category and 55% marks for
SC/ST category are eligible.
<br><br>
4. For admission to M.Tech. (Mechanical Engineering and related branches),
candidates having degree of B.Tech. in Mechanical Engineering/Production
Engineering/Industrial Engineering or equivalent degree in related discipline with
at least 60% marks for General/OBC category and 55% marks for SC/ST category are
eligible. <br><br>
5. For admission to M.Tech. (Civil Engineering and related branches), candidates
having degree of B.Tech. in Civil Engineering or equivalent degree in related
discipline with at least 60% marks for General/OBC category and 55% marks for SC/ST
category are eligible.
<br><br>
6. The equivalence of any degree for admission to any programme shall be decided by
the University. The eligibility criteria given above are minimum and mere possessing
the same does not qualify a candidate for admission. University may prescribe any
other requirements over and above these conditions.
<hr>
<h2>BPHARMA</h2>
IEC, one of the premier institutions in India provides professional courses in
Pharmacy. <br><br>
Pharmacy education in India has undergone tremendous changes to meet the requirements
of industry and community at large. The Diploma in Pharmacy is able to meet the
requirements of community and hospital stores only partly. The degree program
(B.Pharma) is developed to address all other demands of the profession of pharmacy.
<br><br>
With higher qualification, B.Pharma, a person could land jobs in pharma industry
in several niche areas, including research, regulatory affairs, new formulation
development, marketing and administration. With experience, an aspirant can move
up the ladder to occupy senior positions in pharmaceutical companies getting
hefty pay and perks.<br><br>
IEC started offering Pharmacy program in 2006 and became the one of the Best College
to offer a UG And PG courses in Delhi-NCR.
<br><br>
<a href="#">D. Pharma</a><br />
<a href="#">B. Pharma</a><br />
<a href="#">M. Pharma in Pharmaceutics</a><br />
<a href="#">M. Pharma in Pharmacology</a><br />
<hr>
<h2>MBA</h2>
One of The Best Management College in North India
<br><br>
The two year MBA Programme at IEC is approved by AICTE and affiliated AKTU (Lucknow)
with and the program has been carefully crafted & taught in a manner which
accomplishes the objective of creating leaders who make a radical impact through
their Principles & Work style imbibed at the institute. The world recognized MBA
degree is conferred in Dr. Abdul Kalam Technical University convocation ceremony.
<br><br>
The session starts from July- August every year and the students go out for two
months summer training after their second semester. The course consists of four
semester with 8 subjects in each semester <br><br>
<h3>COURSE DURATIONS-2 YEARS</h3>
<hr>
<p style="text-align: center;">Copyrights © 2024 IEC. All rights reserved.</p>
<hr>
</body>
</html>Output:

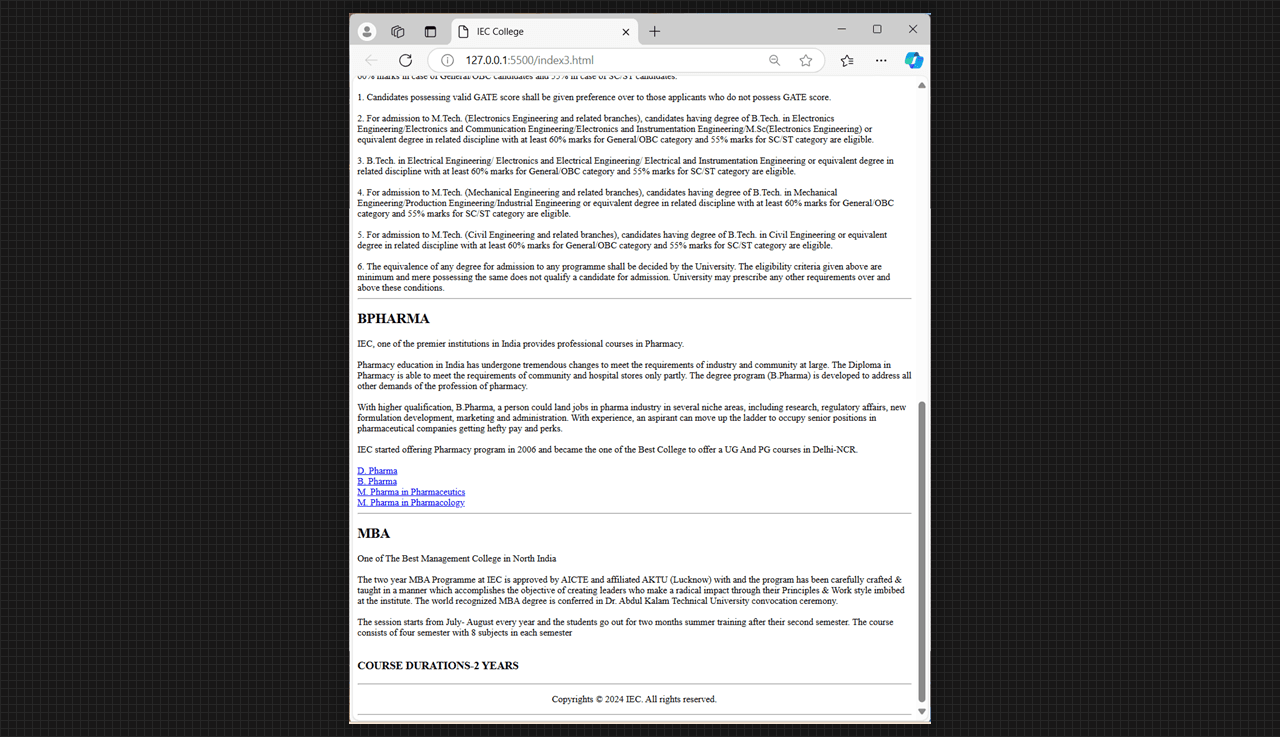
Institution website output, page 1.
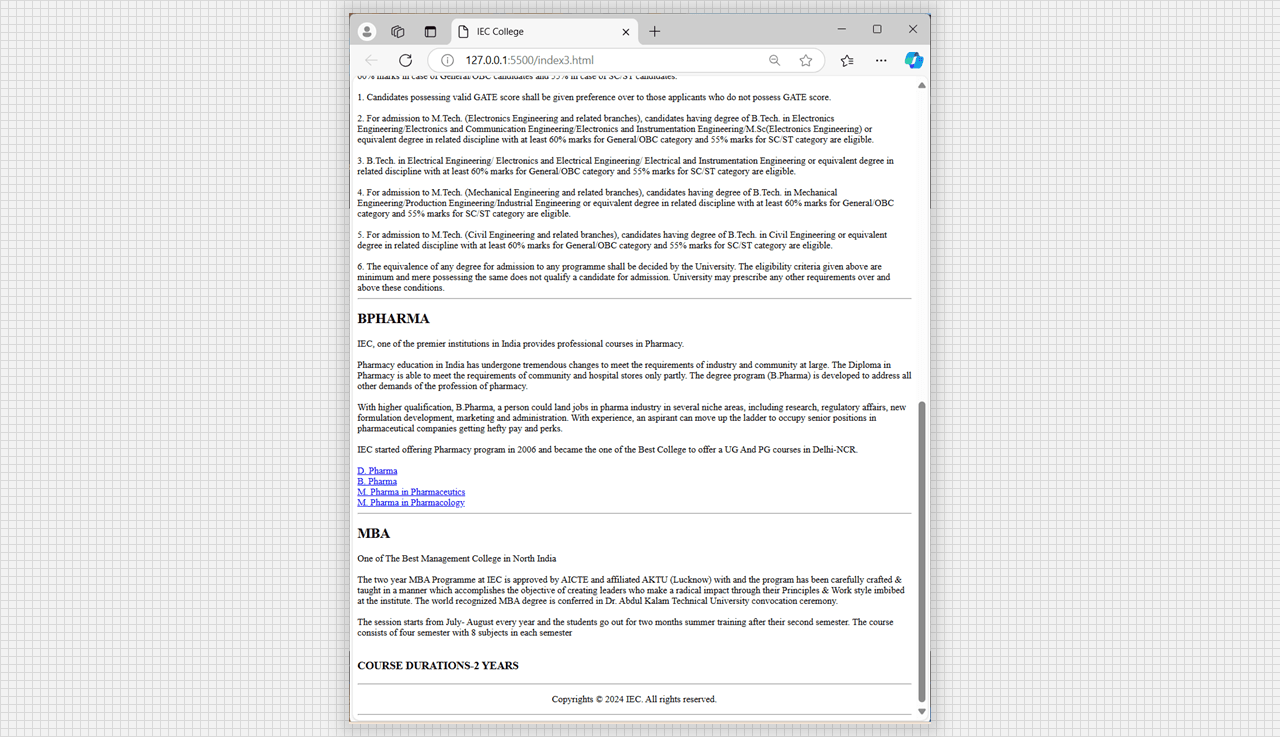
Institution website output, page 2.
<!DOCTYPE html>
<html lang="en">

<head>
    <meta charset="UTF-8">
    <meta name="viewport" content="width=device-width, initial-scale=1.0">
    <title>Registration Form</title>
</head>

<body>
    <h1 style="text-align: center;">
        IEC College of Engineering & Technology
    </h1>
    <h2 style="text-align: center;">
        Students Registration Form
    </h2>
    <hr>
    <form>
        <label>Student's Name</label>
        <input type="text" placeholder="Name" size="30" /> <br> <br>
        <label>Father's Name</label>
        <input type="text" placeholder="Father's Name" size="30" /> <br> <br>
        <label>Mother's Name</label>
        <input type="text" placeholder="Mother's Name" size="30" /> <br> <br>
        <label>Gender</label>
        <select>
            <option value="Male">Male</option>
            <option value="Male">Female</option>
            <option value="Male">Other</option>
        </select> <br> <br>
        <label>Date of Birth</label>
        <input type="Date of Birth" placeholder="DD/MM/YYYY" required><br><br>
        <label>Address</label>
        <textarea cols="80" rows="5" placeholder="Address"></textarea><br><br>
        <label>Course</label>
        <select>
            <option value="B.Tech">B.Tech</option>
            <option value="M.Tech">M.Tech</option>
            <option value="M.B.A.">M.B.A.</option>
            <option value="B.Pharma">B.Pharma</option>
            <option value="M.Pharma">M.Pharma</option>
        </select><br> <br>
        <label>E-mail</label>
        <input type="E-mail" placeholder="E-mail" required><br> <br>
        <label>Phone</label>
        <input type="text" name="Country Code" value="+91" size="2" />
        <input type="text" placeholder="Phone" size="10" /> <br> <br>
        <input type="button" value="Submit" />
        </label>
    </form>
</body>

</html>
Output:
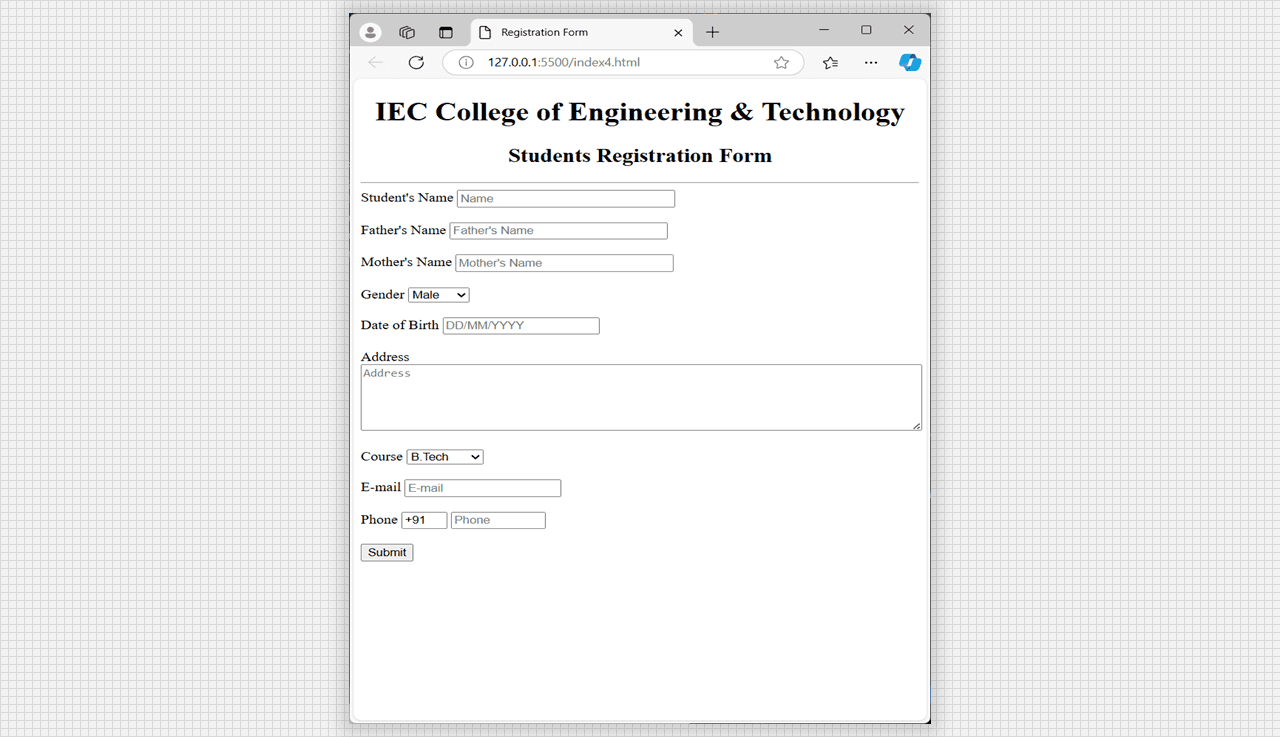
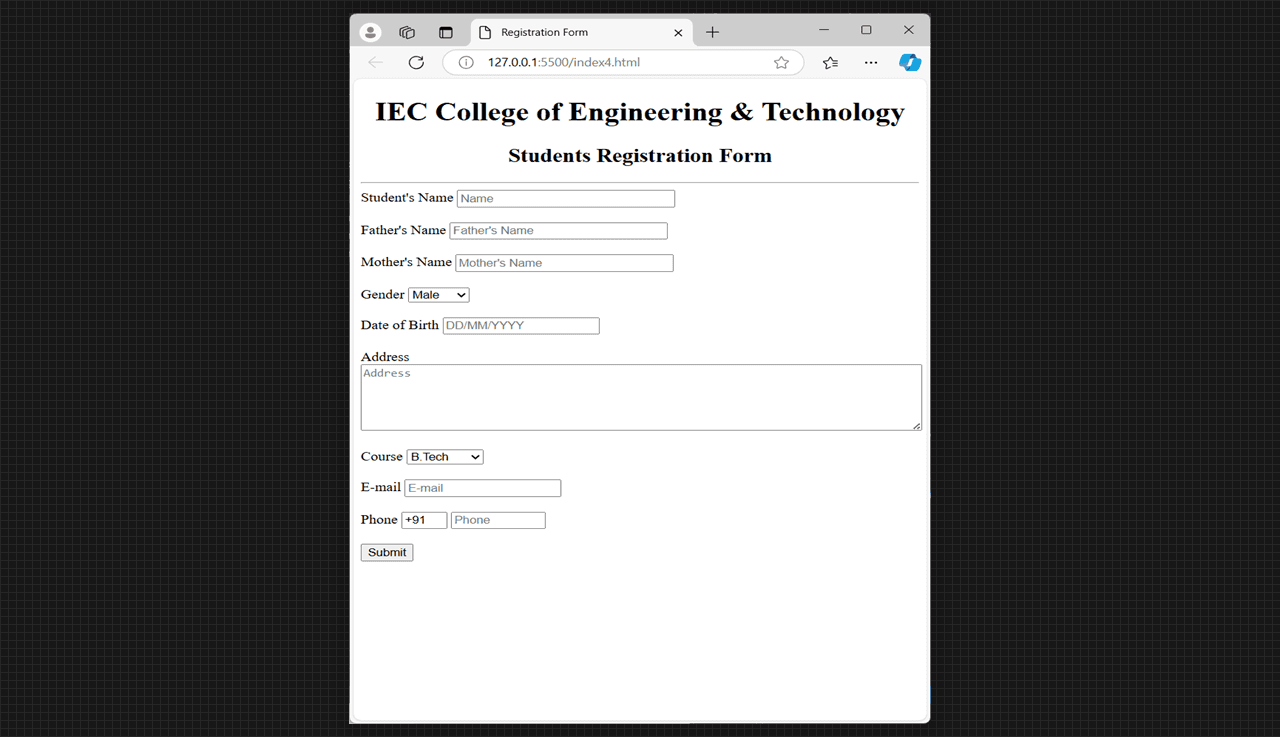
College Registration form in HTML, output.
<!DOCTYPE html>
<html lang="en">
<head>
<meta charset="UTF-8">
<meta name="viewport" content="width=device-width, initial-scale=1.0">
<title>Responsive Tutorial Site</title>
<link rel="stylesheet" href="styles.css">
</head>
<body>
<header>
<h1><a href="#">Learn Coding</a></h1>
<nav>
<ul class="dp-view">
<li><a href="#">Home</a></li>
<li><a href="#">Tutorials</a></li>
<li><a href="#">About</a></li>
<li><a href="#">Contact</a></li>
</ul>
<a href="#" class="btn">Learn</a>
<div class="menu-icon" onclick="toggleMenu()">☰</div>
</nav>
</header>
<script>
function toggleMenu() {
const menu = document.querySelector('header nav .dp-view');
menu.classList.toggle('active');
}
</script>
<main>
<section class="content">
<h2>Welcome to the Tutorial Site</h2>
<p>Start your coding journey with our easy-to-follow tutorials!</p>
</section>
<section class="tutorial">
<h2>Featured Tutorial: HTML Basics</h2>
<p>This tutorial covers the basics of HTML, the foundation of web development.</p>
<a href="#" class="btn">Read More</a>
</section>
<section class="tutorial">
<h2>Featured Tutorial: CSS Advance</h2>
<p>This tutorial covers the basics of CSS, the designing of web development.</p>
<a href="#" class="btn">Read More</a>
</section>
<section class="tutorial">
<h2>Featured Tutorial: JS Basics</h2>
<p>This tutorial covers the basics of JS, the functionlaity of web development.</p>
<a href="#" class="btn">Read More</a>
</section>
</main>
<footer>
<p>© 2024 Learn Coding. All rights reserved.</p>
</footer>
</body>
</html>Style sheet for the above code is as follows:
/* Reset some basic styles */
* {
    margin: 0;
    padding: 0;
    box-sizing: border-box;
}

/* Set up the main layout */
body {
    font-family: Arial, sans-serif;
    line-height: 1.6;
}

header {
    display: flex;
    background: #333;
    width: 100%;
    color: #fff;
    padding: 0 26px;
    text-align: center;
    justify-content: space-between;
}

header h1 {
    margin-bottom: 12px;
}

header h1 a {
    color: #fff;
    text-decoration: none;
}

header h1 a:hover {
    color: #ffffffab;
    text-decoration: none;
}

header nav {
    display: flex;
    padding: 0px;
    align-items: center;
}

header nav .dp-view {
    width : 250px;
    display: flex;
    align-items: center;
    justify-content: space-between;
    list-style: none;
    padding: 0 8px;
}

header nav .dp-view li {
    display: block;
    margin: 0.7rem 0;
}

header nav .dp-view li a {
    color: #fff;
    text-decoration: none;
}

header nav .dp-view li a:hover {
    color: #ffffffab;
}

header .btn {
    display: inline-block;
    height: min-content;
    padding: 0.3rem 1rem;
    color: #333;
    font-weight: 700;
    background: #fff;
    text-decoration: none;
    border-radius: 5px;
}

header .btn:hover {
    opacity: 0.8;
}

.menu-icon {
    display: none;
    font-size: 2rem;
    cursor: pointer;
    margin-left: 16px;
}

header nav #nav-list {
    display: none;
}


main {
    padding: 1rem;
    display: flex;
    flex-direction: column;
    align-items: center;
}

main .content,
main .tutorial {
    width: 80%;
    background: #f4f4f4;
    padding: 1rem;
    margin: 1rem 0;
    border-radius: 5px;
    text-align: center;
}

main .btn {
    display: inline-block;
    padding: 0.5rem 1rem;
    color: #fff;
    background: #333;
    text-decoration: none;
    border-radius: 5px;
    margin-top: 1rem;
}

main .btn:hover {
    opacity: 0.8;
}

footer {
    background: #333;
    color: #fff;
    text-align: center;
    padding: 1rem 0;
    margin-top: 1rem;
}

/* Media Queries for Responsiveness */
@media (max-width: 768px) {

    main .content,
    main .tutorial {
        width: 100%;
    }

    header nav .dp-view {
        display: none;
        flex-direction: column;
        width: 100%;
    }

    header nav .dp-view.active {
        display: flex;
        margin-right: 3rem;
        background: #333;

    }

    header .menu-icon {
        display: block;
    }
}
Output:
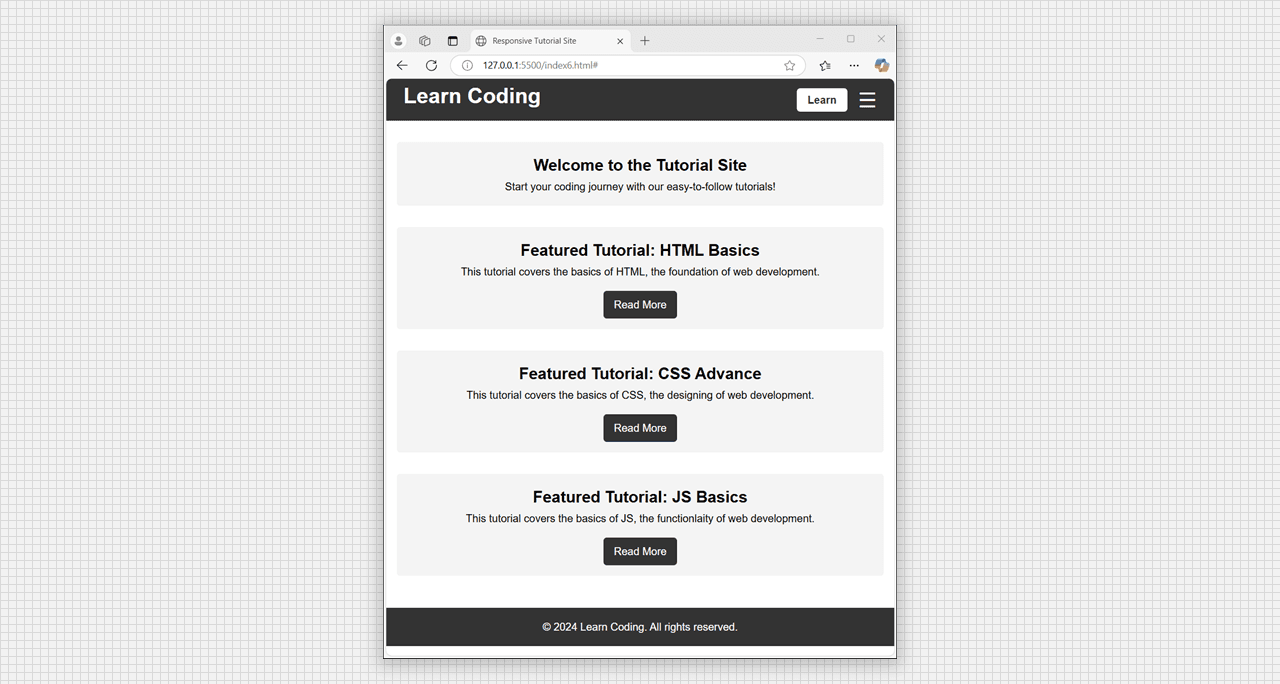
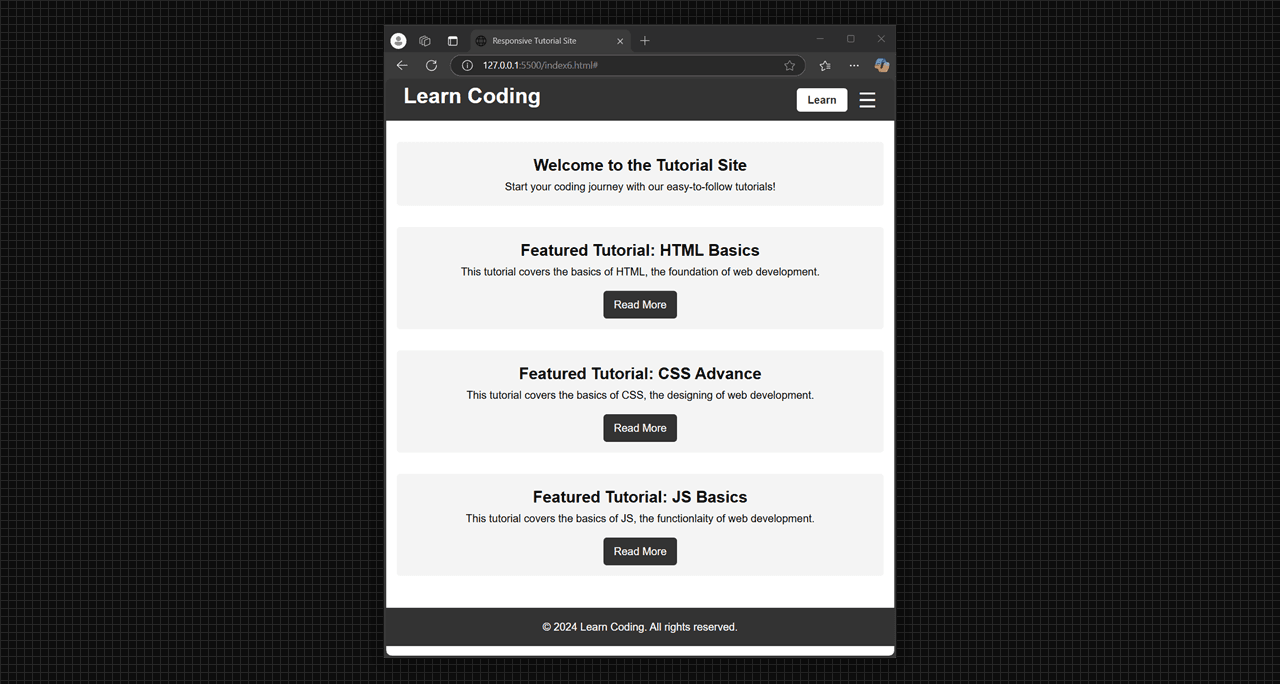
Responsive Website using CSS and HTML for phone.
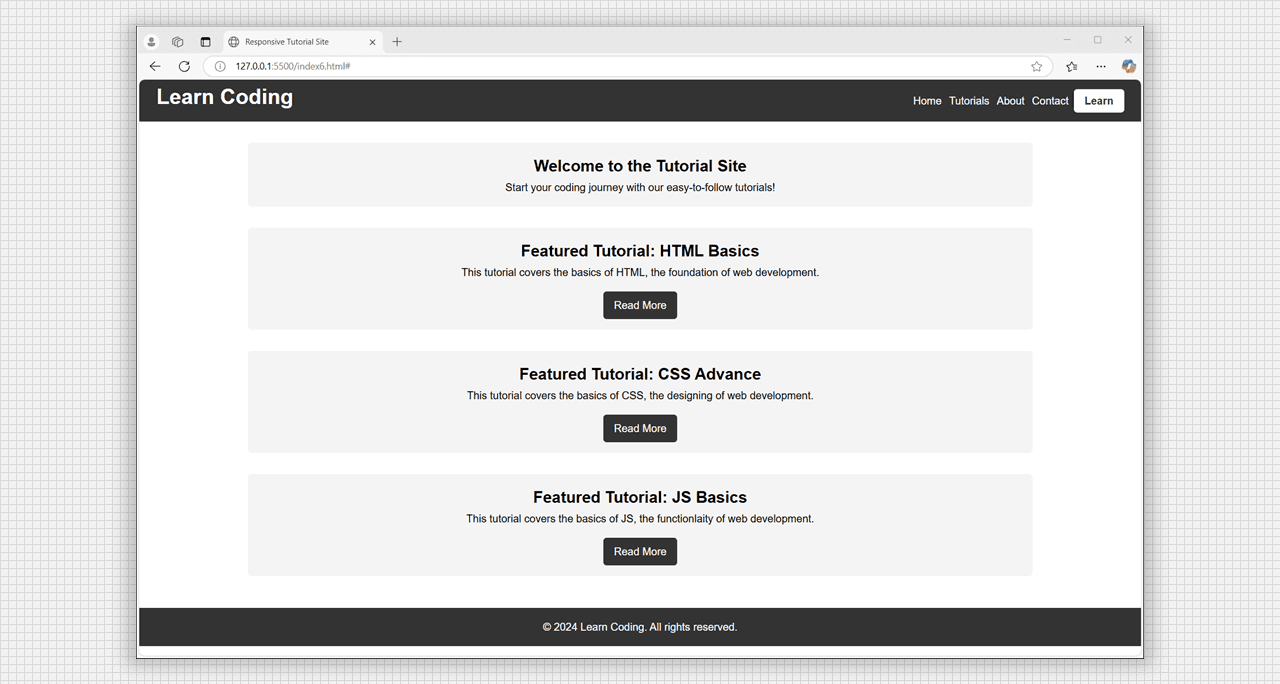
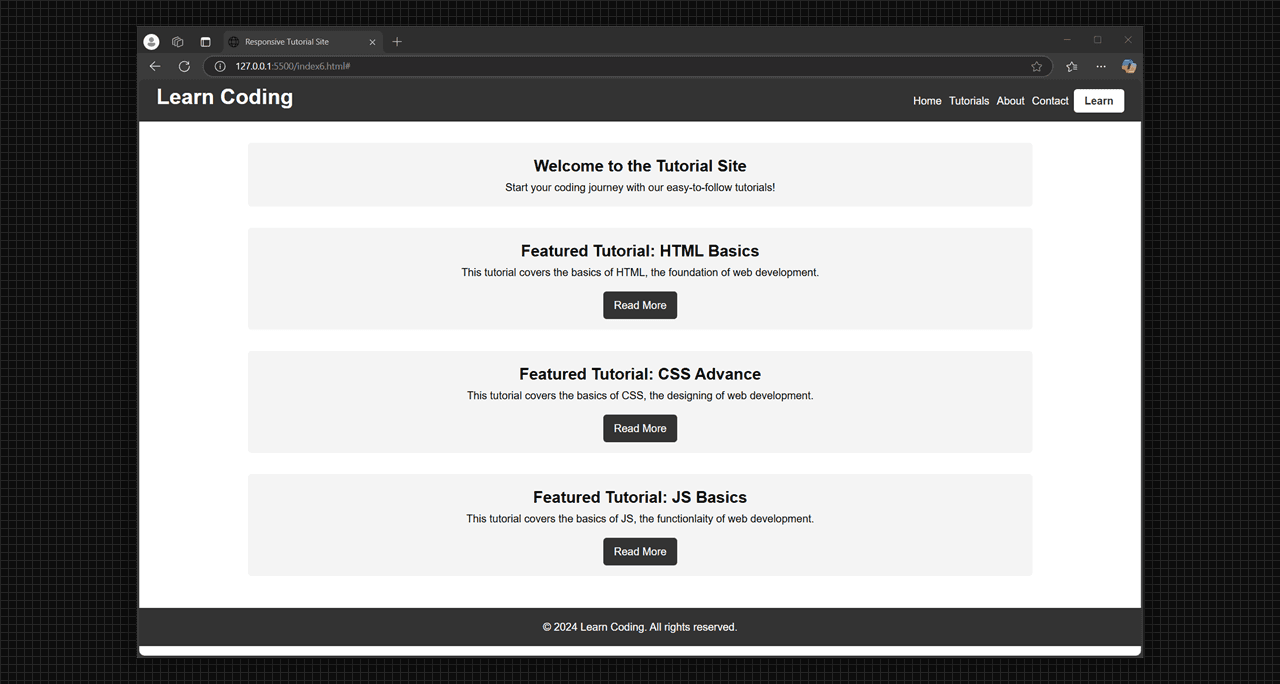
Responsive Website using CSS and HTML for desktop.
<!DOCTYPE html>
<html lang="en">

    <head>
        <meta charset="UTF-8">
    <meta name="viewport" content="width=device-width, initial-scale=1.0">
    <title>Form Validation</title>
    <link rel="preconnect" href="https://fonts.googleapis.com">
    <link rel="preconnect" href="https://fonts.gstatic.com" crossorigin>
    <link href="https://fonts.googleapis.com/css2?family=Poppins:wght@400;700&display=swap" rel="stylesheet">
    <link rel="stylesheet" href="styles.css">
</head>

<body>
    <div class="container">
        <form id="form" method="get" action="/">
            <h1>Registration</h1>
            <div class="input-control">
                <label for="username">Username</label>
                <input id="username" name="username" type="text" placeholder="Enter your username">
                <div class="error"></div>
            </div>
            <div class="input-control">
                <label for="email">Email</label>
                <input id="email" name="username" type="text" placeholder="Enter your e-mail">
                <div class="error"></div>
            </div>
            <div class="input-control">
                <label for="password">Password</label>
                <input id="password" name="password" type="password" placeholder="Enter a new password">
                <div class="error"></div>
            </div>
            <div class="input-control">
                <label for="password">Confirm Password</label>
                <input id="password2" name="password" type="password" placeholder="Re-enter your password">
                <div class="error"></div>
            </div>
            <button type="submit">Sign Up</button>
        </form>
    </div>
    <script src="script.js"></script>
</body>

</html>* {
margin: 0;
padding: 0;
box-sizing: border-box;
}
body {
background: linear-gradient(to right, #ffababac, #cab0ffac, #ffadffac);
font-family: 'Poppins', sans-serif;
}
#form {
position: relative;
width: 300px;
margin: 20vh auto 0 auto;
padding: 32px 16px 30px;
background-color: whitesmoke;
border-radius: 4px;
font-size: 12px;
}
#form h1 {
color: #0f2027;
text-align: center;
margin-bottom: 20px;
}
#form button {
padding: 10px;
margin-top: 10px;
width: 100%;
color: white;
background-color: rgb(41, 57, 194);
border: none;
border-radius: 4px;
cursor: pointer;
}
#form button:hover {
opacity: 0.9;
}
.input-control {
display: block;
width: 100%;
}
.input-control input {
border: 2px solid #f0f0f0;
border-radius: 4px;
display: flex;
font-size: 0.9rem;
padding: 0 8px;
width: 100%;
height: 48px;
}
.input-control input:focus {
outline: 0;
}
.input-control.success input {
border-color: #09c372;
}
.input-control.error input {
border-color: #ff3860;
}
.input-control .error {
color: #ff3860;
font-size: 9px;
height: 13px;
}const form = document.getElementById('form');
const username = document.getElementById('username');
const password = document.getElementById('password');
const password2 = document.getElementById('password2');
form.addEventListener('submit', (e) => {
e.preventDefault();
validateInputs();
});
const setError = (element, message) => {
const inputControl = element.parentElement;
const errorDisplay = inputControl.querySelector('.error');
errorDisplay.innerText = message;
inputControl.classList.add('error');
inputControl.classList.remove('success');
}
const setSuccess = (element) => {
const inputControl = element.parentElement;
const errorDisplay = inputControl.querySelector('.error');
errorDisplay.innerText = '';
inputControl.classList.add('success');
inputControl.classList.remove('error');
};
const isValidEmail = email => {
const re = /^(([^<>()[\]\\.,;:\s@"]+(\.[^<>()[\]\\.,;:\s@"]+)*)|(".+"))@((\[[0-9]{1,3}\.[0-9]{1,3}\.[0-9]{1,3}\.[0-9]{1,3}\])|(([a-zA-Z\-0-9]+\.)+[a-zA-Z]{2,}))$/;
return re.test(String(email).toLowerCase());
}
const validateInputs = () => {
const usernameValue = username.value.trim();
const emailValue = email.value.trim();
const passwordValue = password.value.trim();
const password2Value = password2.value.trim();
if (usernameValue === '') {
setError(username, 'Username is required');
} else {
setSuccess(username);
}
if (emailValue === '') {
setError(email, 'Email is required');
} else if (!isValidEmail(emailValue)) {
setError(email, 'Provide a valid email address');
} else {
setSuccess(email);
}
if (passwordValue === '') {
setError(password, 'Password is required');
} else if (passwordValue.length < 8) {
setError(password, 'Password must be at least 8 character.')
} else {
setSuccess(password);
}
if (password2Value === '') {
setError(password2, 'Please confirm your password');
} else if (password2Value !== passwordValue) {
setError(password2, "Password doesn't match");
} else {
setSuccess(password2);
}
}Output:
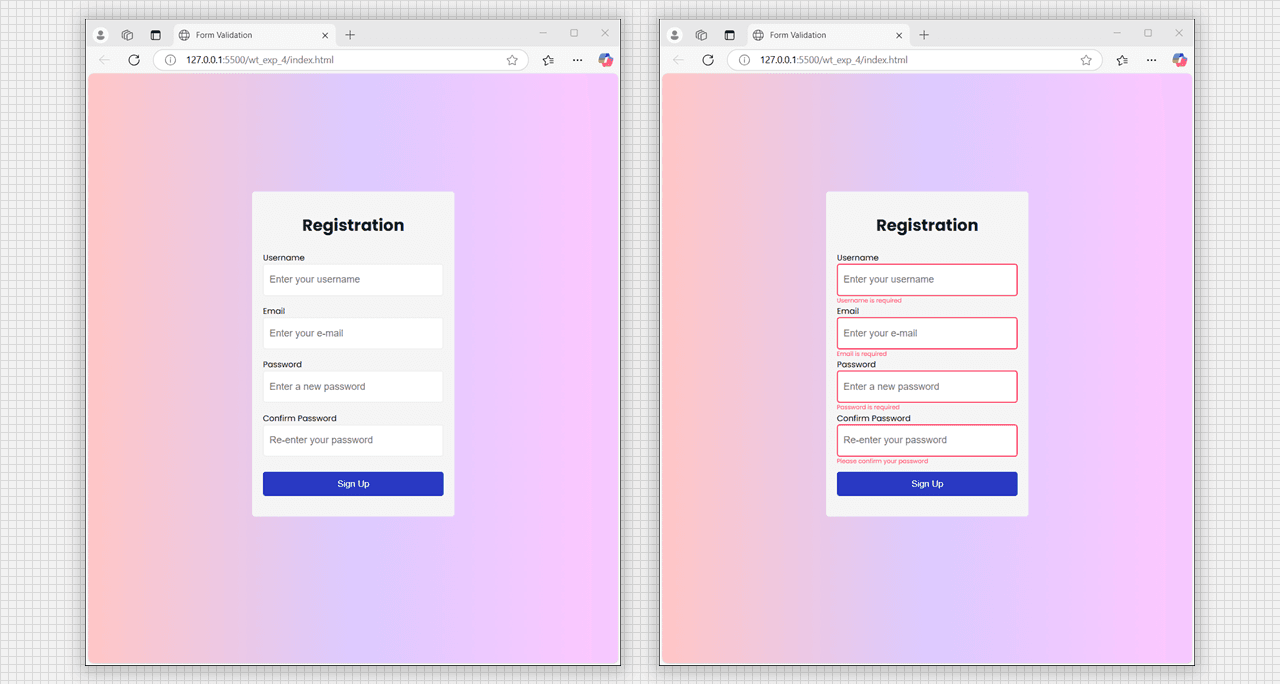
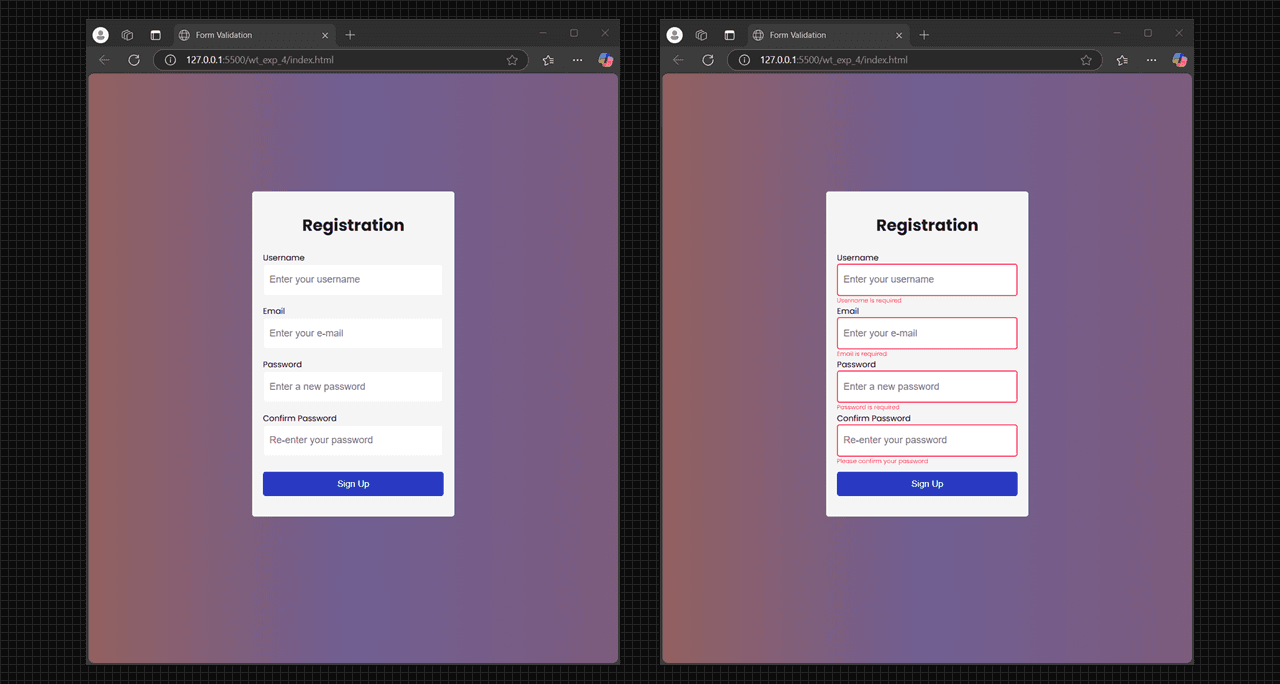
Registration form validate the input using JavaScript. empty, error.
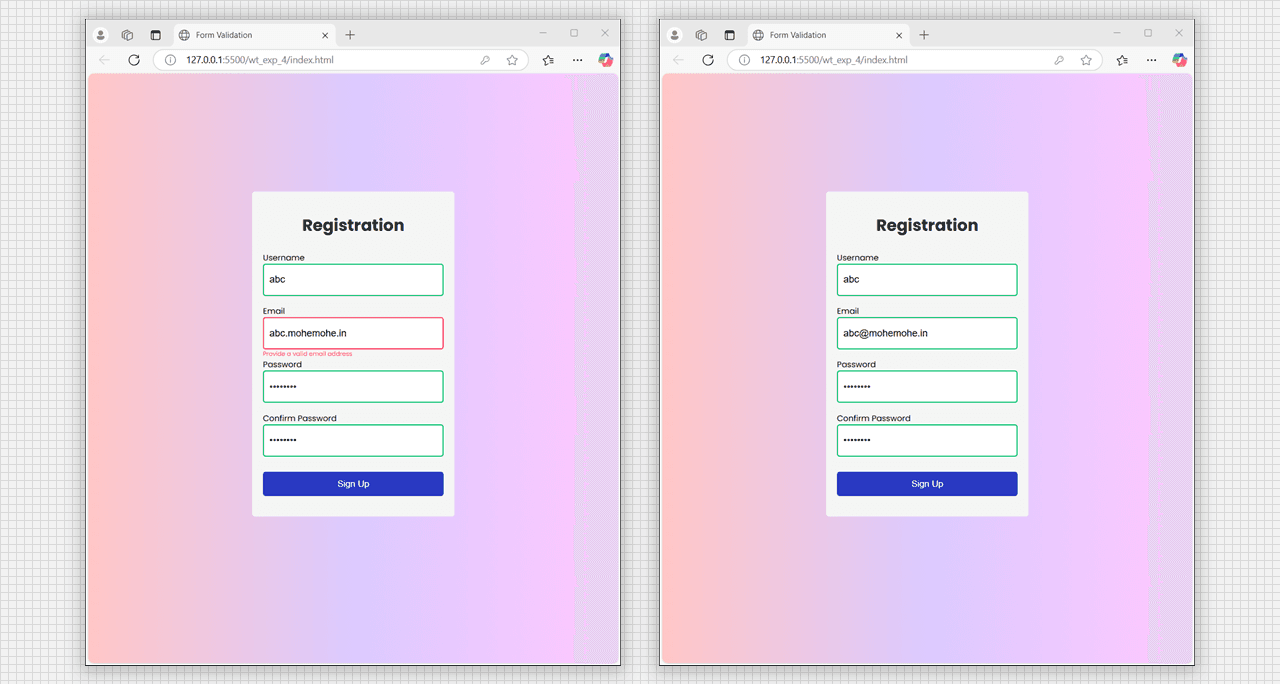
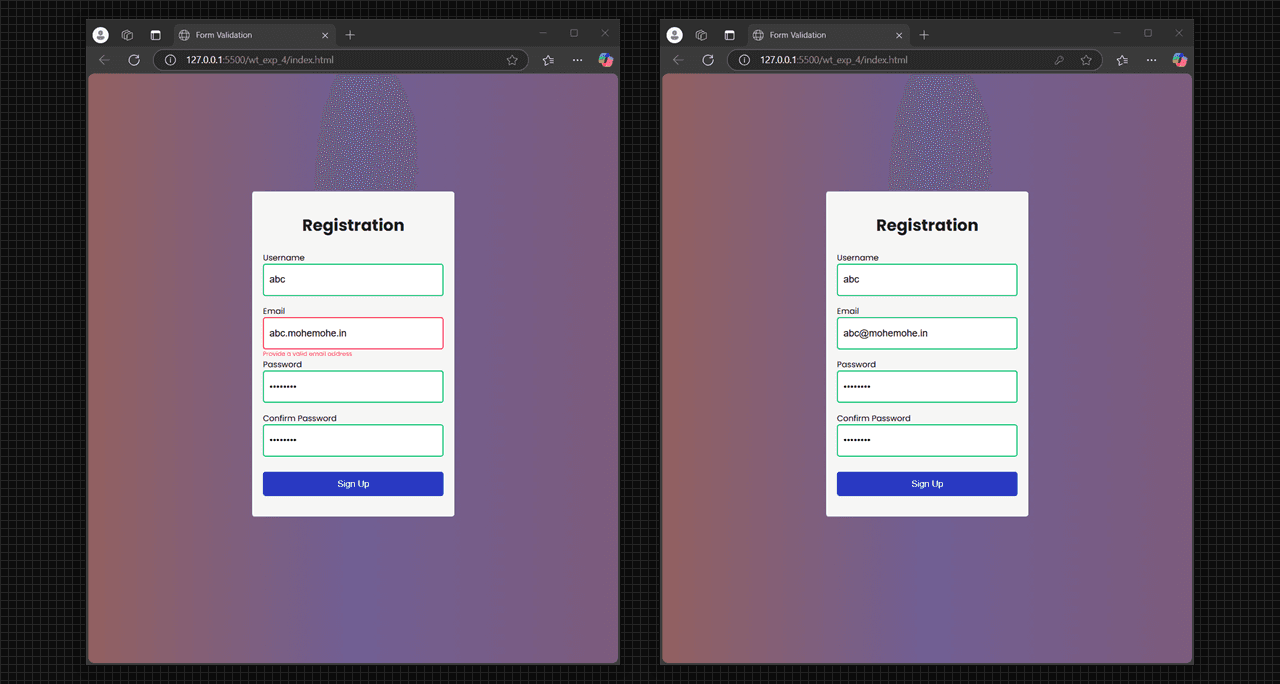
Registration form validate the input using JavaScript. error, correct.
Theory:
An XML document with correct syntax is called Well Formed. An XML document validated against a DTD is both Well Formed and Valid.
A Valid XML document is a Well Formed XML document, which also conforms to the rules of a DTD—
- DTD declaration either internal XML document or make external DTD file, after linked to a XML document.
- Internal DTD You can write rules inside XML document using
<!DOCTYPE ... >declaration. Scope of this DTD within this document. Advantages is document validated by itself without external reference. - External DTD You can write rules in a separate file with
.dtdextension. later this file linked to a XML document. This way you can linked several XML documents refer same DTD rules.
Example:
<?xml version="1.0" encoding="UTF-8"?>
<!DOCTYPE lab_file SYSTEM "lab_file.dtd">
<lab_file>
    <title>Introduction to HTML</title>
    <author>Prince Kunal</author>
    <date>2024-12-22</date>
    <description>This lab covers the basics of HTML, including elements, attributes,
    and structure.
    </description>
    <steps>
        <step>Open a text editor and create a new HTML file.</step>
        <step>Write the basic HTML structure with doctype, html, head, and body tags.</step>
        <step>Add a title to the head section.</step>
        <step>Write some content inside the body section.</step>
    </steps>
</lab_file>
<!ELEMENT lab_file (title, author, date, description, steps)>
<!ELEMENT title (#PCDATA)>
<!ELEMENT author (#PCDATA)>
<!ELEMENT date (#PCDATA)>
<!ELEMENT description (#PCDATA)>
<!ELEMENT steps (step+)>
<!ELEMENT step (#PCDATA)>
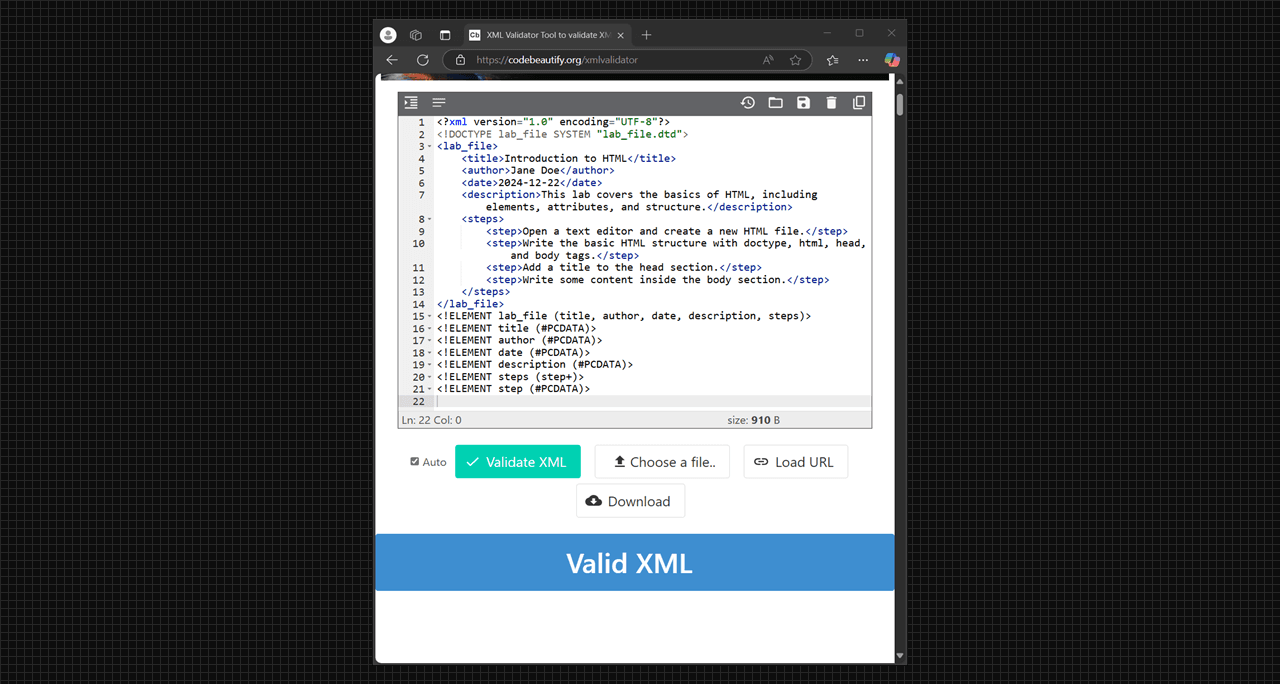
Validate the XML Document:
There are several online XML validator available that can be used to validate XML documents against a DTD.
- Visit an online XML validator
- Upload or paste XML and DTD file code.
- Click on the validate button.
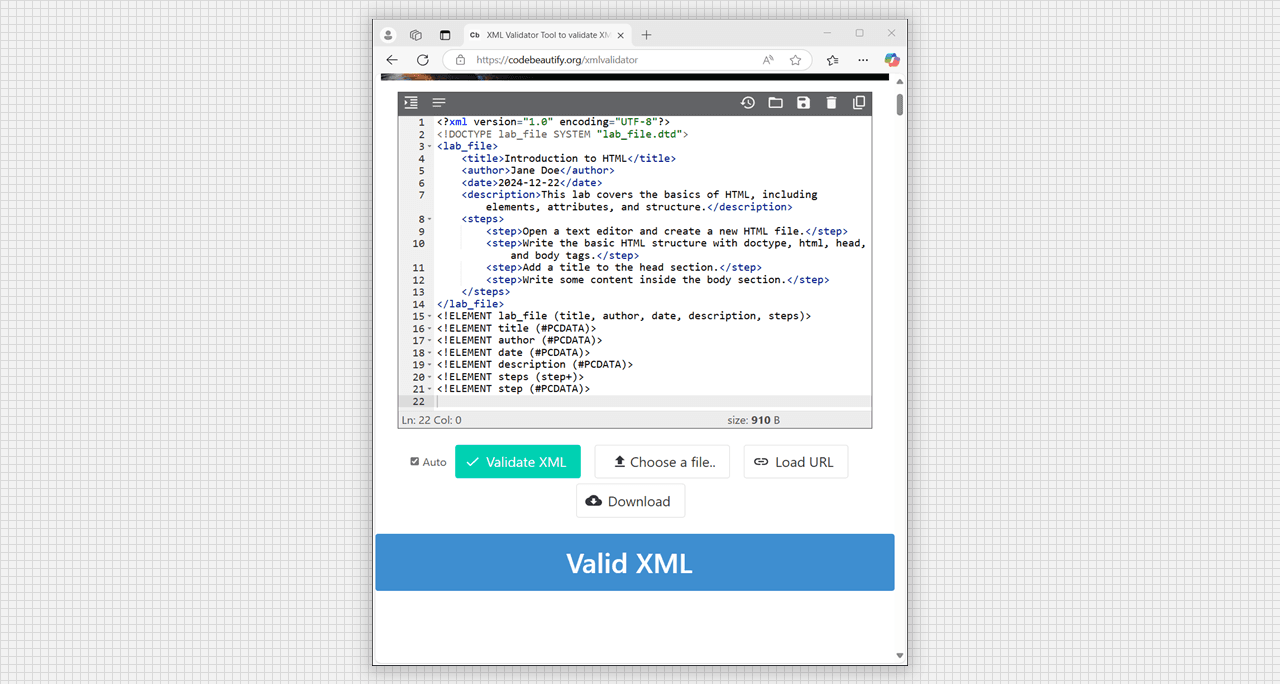
Online validating the XML document as DTD rule set.
<?xml version="1.0" encoding="UTF-8"?>
<?xml-stylesheet type="text/xsl" href="style.xsl"?>
<document>
    <header>
        <title>Welcome to My XSL Styled Document</title>
    </header>
    <main>
        <section>
            <heading>Introduction</heading>
            <content>This is a sample document to demonstrate XSL styling.</content>
        </section>
        <section>
            <heading>Content</heading>
            <content>Here is some more content to style using XSL.</content>
        </section>
    </main>
    <footer>
        <text>© 2024 Sample Website</text>
    </footer>
</document><?xml version="1.0" encoding="UTF-8"?>
<xsl:stylesheet version="1.0" xmlns:xsl="http://www.w3.org/1999/XSL/Transform">
<xsl:template match="/">
<html>
<head>
<title>
<xsl:value-of select="document/header/title" />
</title>
<style>
body { font-family: Arial, sans-serif; background-color: #f4f4f4; padding: 20px;
}
header { background-color: #333; color: #fff; padding: 10px; text-align: center;
}
main { margin-top: 20px; }
section { background-color: #fff; margin-bottom: 20px; padding: 15px;
border-radius: 5px; box-shadow: 0 2px 4px rgba(0, 0, 0, 0.1); }
footer { background-color: #333; color: #fff; padding: 10px; text-align: center;
margin-top: 20px; }
</style>
</head>
<body>
<header>
<h1>
<xsl:value-of select="document/header/title" />
</h1>
</header>
<main>
<xsl:for-each select="document/main/section">
<section>
<h2>
<xsl:value-of select="heading" />
</h2>
<p>
<xsl:value-of select="content" />
</p>
</section>
</xsl:for-each>
</main>
<footer>
<p>
<xsl:value-of select="document/footer/text" />
</p>
</footer>
</body>
</html>
</xsl:template>
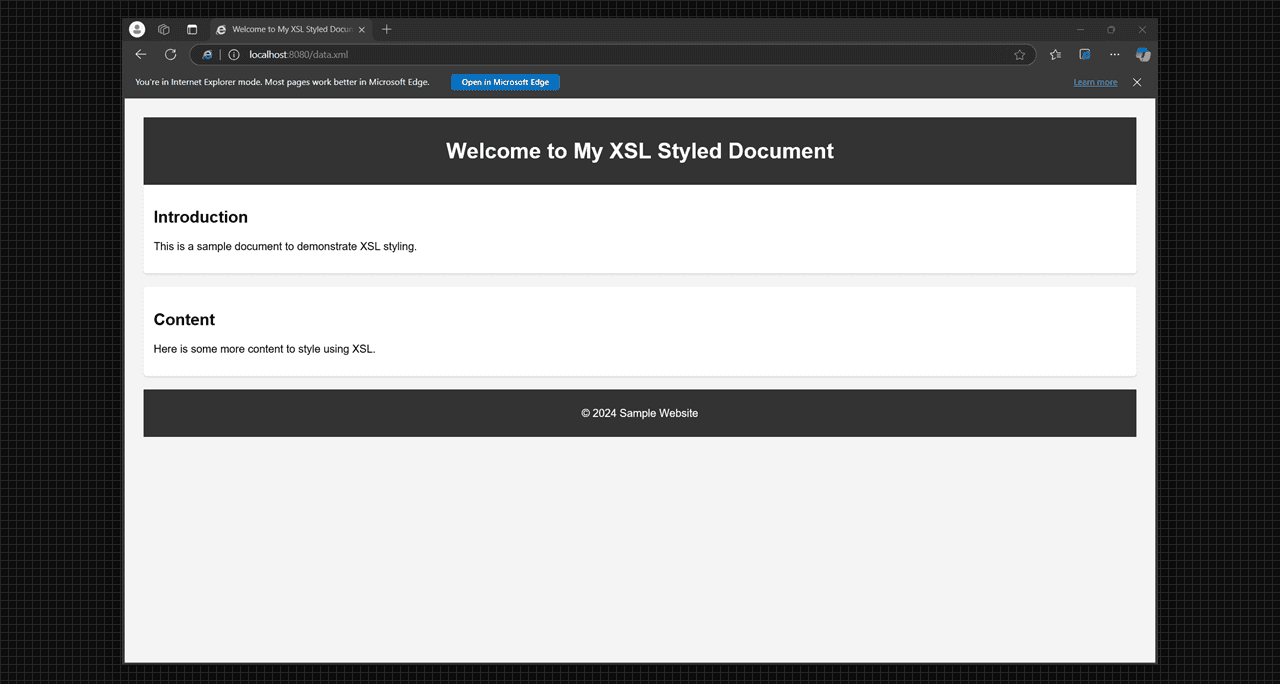
</xsl:stylesheet>Change default edge browser to internet explorer and open the data.xml file. You will see the document styled using the style.xsl file.
if not appling the css property in output then install http-server package in your vs code and run the server using http-server command in the terminal.
Output:
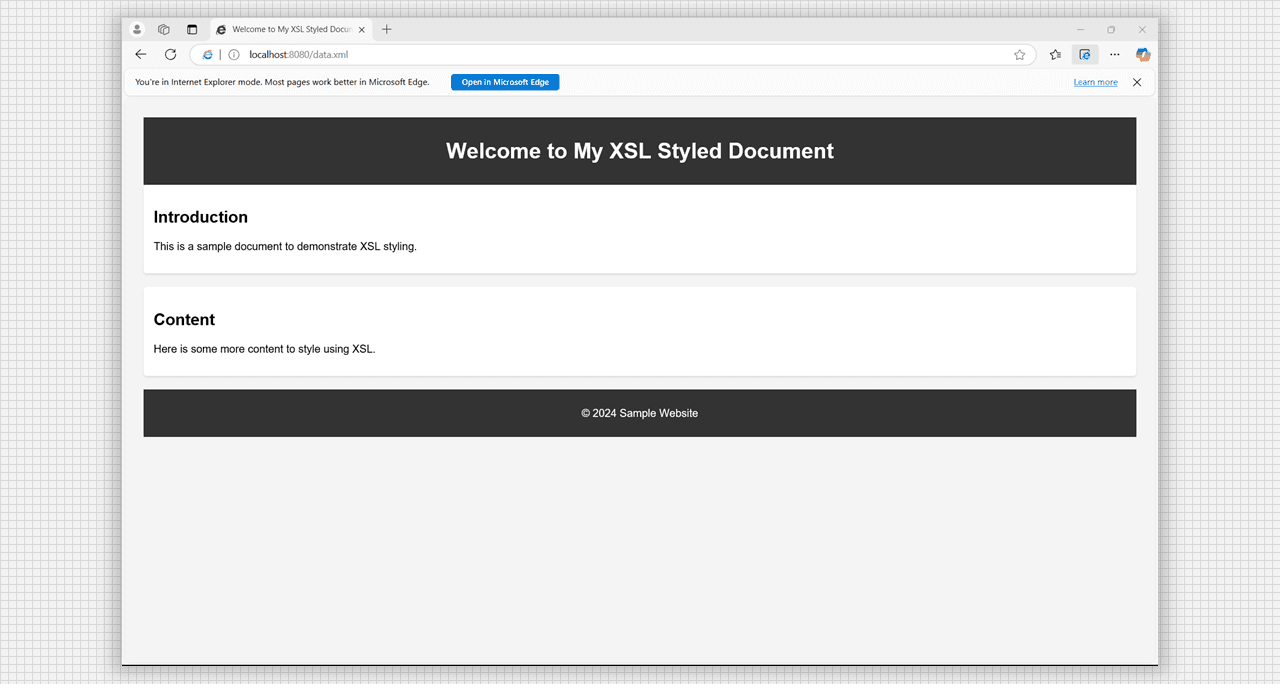
A Simple and basic website using XML and XSL, output.
Objective: Build a command-line utility using Node.js that performs a specific task, such as converting text to uppercase, calculating the factorial of a number, or generating random passwords.
Theory:
A random password Generator is a tool that generates a random password based on the user's requirements. The user can specify the length of the password and whether it should include uppercase letters, lowercase letters, numbers, and symbols. The password generator uses a set of characters to generate a random password of the specified length.
Create a folder for the project and initialize a new Node.js project using the following commands:
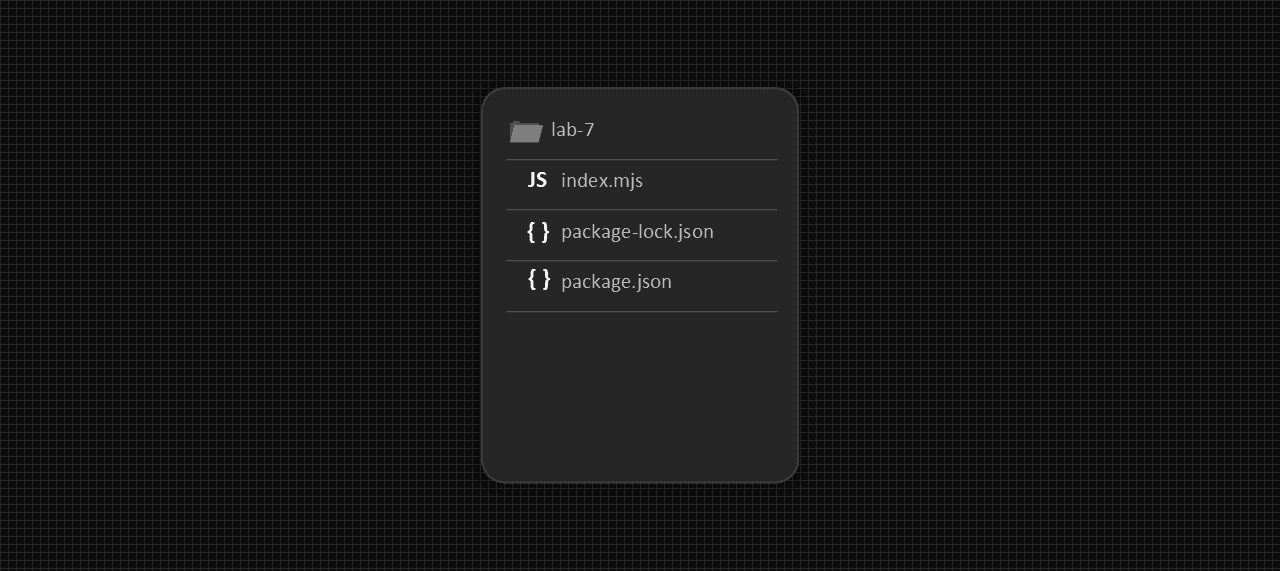
npm init -ynpm install commander chalkFile Structure:
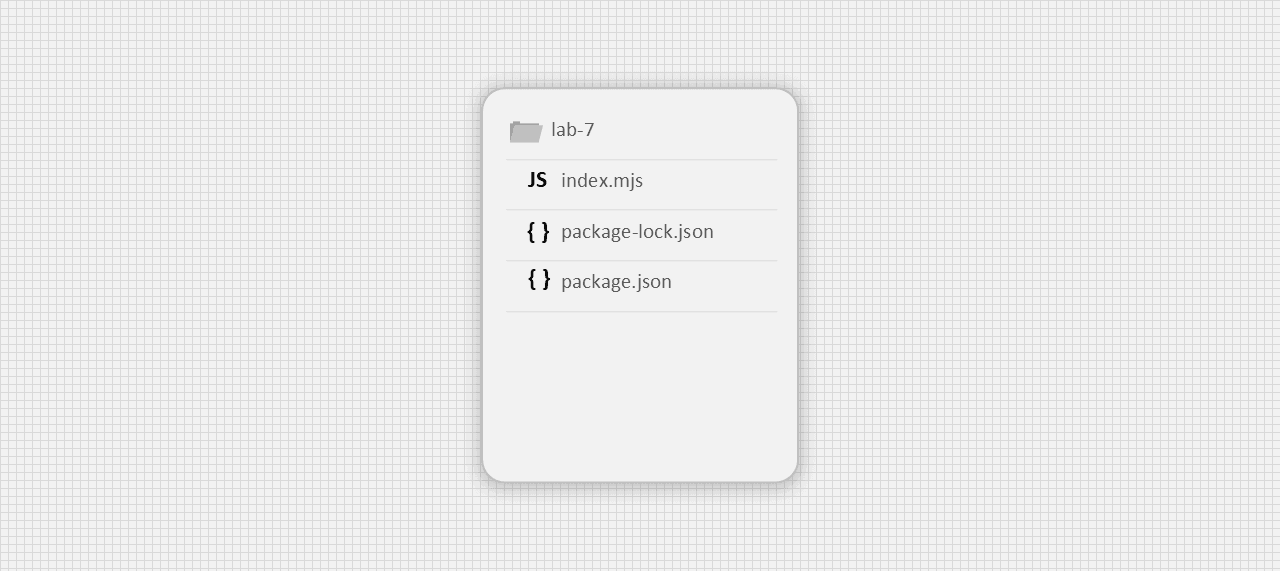
File Structure of Node JS.
Create index.mjs file and add the following code.
import { Command } from 'commander';
import chalk from 'chalk';

const generatePassword = (length, options) => {
    const lowercase = 'abcdefghijklmnopqrstuvwxyz';
    const uppercase = 'ABCDEFGHIJKLMNOPQRSTUVWXYZ';
    const numbers = '0123456789';
    const symbols = '!@#$%^&*()_+[]{}|;:,.<>?';

    let characters = lowercase;
    // Corrected typo in 'characters'
    if (options.uppercase) characters += uppercase;
    if (options.numbers) characters += numbers;
    if (options.symbols) characters += symbols;

    let password = '';
    for (let i = 0; i < length; i++) {
        const randomIndex = Math.floor(Math.random() * characters.length);
        password += characters[randomIndex];
    }
    return password;
}

const program = new Command();
program
    .version('1.0.0')
    .description('Random Password Generator')
    .option('-l, --length <number>', 'length of the password', '12')
    .option('-n, --numbers', 'include numbers', false)
    .option('-s, --symbols', 'include symbols', false)
    .option('-u, --uppercase', 'include uppercase letters', false)
    .parse(process.argv);

const options = program.opts();
const length = parseInt(options.length);
// Added check for NaN
if (isNaN(length) || length <= 0) {
    console.error(chalk.red.bold('Error: Length must be a positive number.'));
    process.exit(1);
}
const password = generatePassword(length, options);

console.log(chalk.green.bold('Generated Password: ') + chalk.yellow.bold(password));{
"name": "lab-7",
"version": "1.0.0",
"main": "index.mjs",
"scripts": {
"start": "node index.mjs",
"test": "echo \"Error: no test specified\" && exit 1"
},
"bin": {
"generate-password": "index.mjs"
},
"keywords": [],
"author": "",
"license": "ISC",
"description": "",
"dependencies": {
"chalk": "^5.4.1",
"commander": "^12.1.0"
}
}Output:
node index.mjs --length 0
Error: Length must be a positive number.node index.mjs --length 16 --numbers --symbols --uppercase
Generated Password: &:jKlaM^jEkY#:D;Objective: Develop a script that uses MongoDB's aggregation framework to perform operations like grouping, filtering, and sorting. For instance, aggregate user data to find the average age of users in different cities
Theory:
MongoDB's aggregation framework is a powerful tool for performing and analysis directly within the database. It allows for the transformation and computation of data using a pipeline of stages, each performing a specific operation on the data.
- Aggrigation Pipeline: An aggrigation pipeline consists of multiple stages, each performing a specific operation on the input data. The stages are processed sequentially, with the output of one stage being passed as input to the next stage.
$match: Filters the documents based on the specified condition.$group: Groups the documents by a specified indentifer and can perform various operations on the grouped data, such as calculating the average, sum, or count.$avg: Calculates the average value of the specified field across all the documents in the group.$sort: Sorts the documents based on the specified field and order.
initialize a new Node.js project and install the required dependencies.
npm init -ynpm install express mongodb- initialize a node.js project and create a new file
index.js. - initiate a new MongoDB client and connect to the MongoDB server.
const express = require('express');
const { MongoClient } = require('mongodb');

const app = express();
const port = 3000;

app.use(express.json()); // Middleware to parse JSON request bodies

app.listen(port, () => {
    console.log(`Server is running on port ${port}`);

})

const uri = 'mongodb://localhost:27017';
const client = new MongoClient(uri);

app.post('/addUser', async (req, res) => {
    try {
        await client.connect();
        const database = client.db('userDatabase');
        const collection = database.collection('users');

        const user = req.body; // Get user data from request body
        await collection.insertMany(user);
        console.log('User inserted successfully');

        res.status(201).send('User added successfully');
    } catch (err) {
        console.log(err);
        res.status(500).send('Error adding user');
    } finally {
        await client.close();
    }
});

app.get('/aggrigate', async (req, res) => {
    try {
        await client.connect();
        // Create or use userDatabase database
        const database = client.db('userDatabase');
        // Create or use users collection
        const collection = database.collection('users');

        // Aggregation pipeline to calculate the average age of users in different cities
        const aggregationPipepline = [
            // Use $avg to calculate the average age
            { $group: { _id: "$city", averageAge: { $avg: "$age" } } },
            { $sort: { averageAge: -1 } }
        ];

        // Perform aggregation
        const results = await collection.aggregate(aggregationPipepline).toArray();

        // Log the results
        console.log(`Average age of users in different cities: `);
        results.forEach(result => {
            console.log(`City: ${result._id}, Average Age: ${result.averageAge}`);

        });
        res.json(results);
    } catch (err) {
        console.log(err);
        res.status(500).send('Error performing aggrigation');
    } finally {
        await client.close();
    }
});
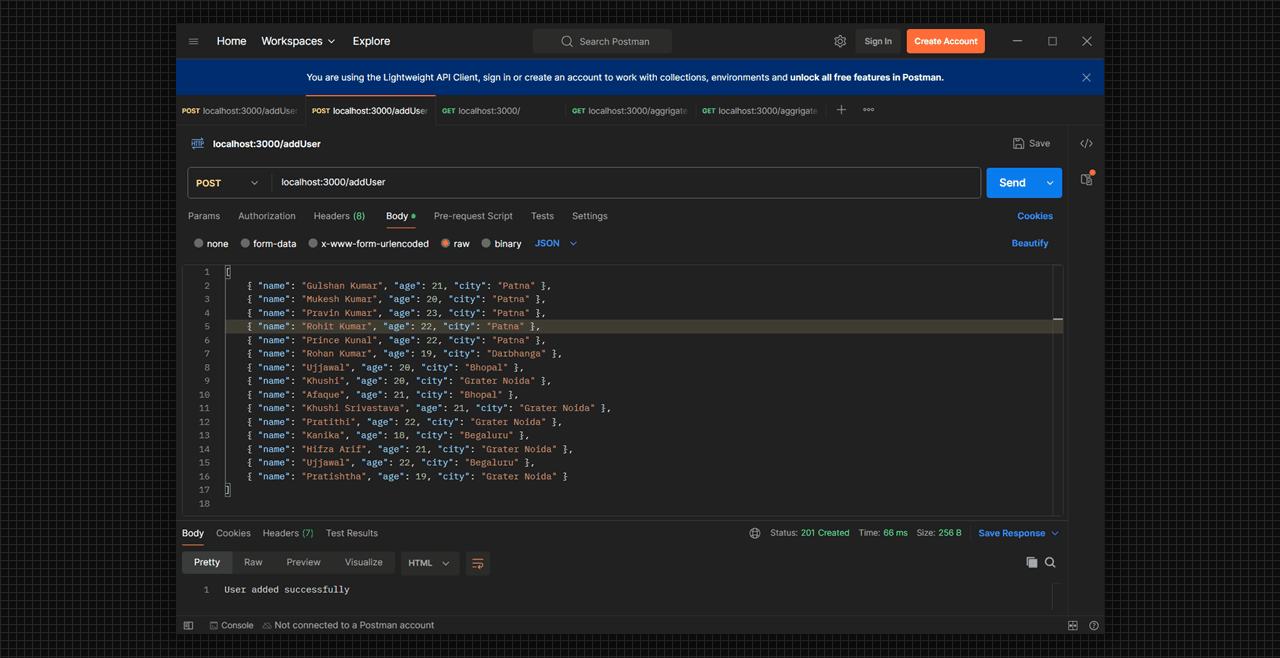
Inserting Data: Inserting JSON data using Postman. on localhost:3000/aggregate with POST method.
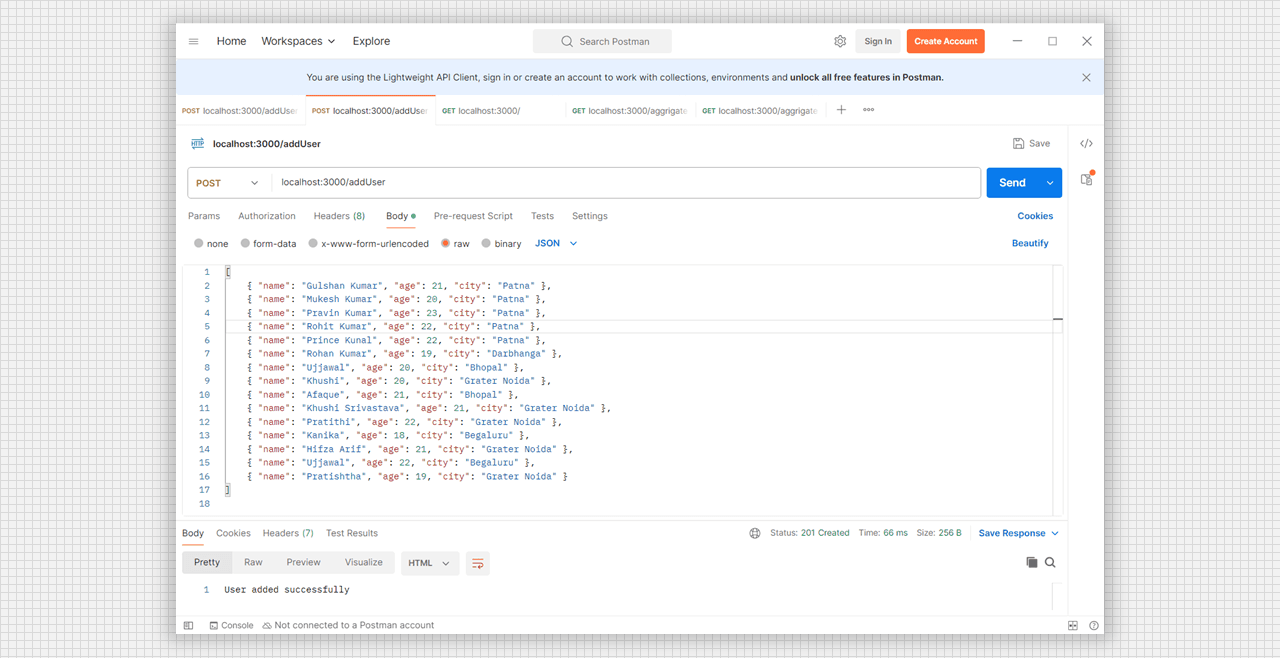
Inserting the JSON data using postman.
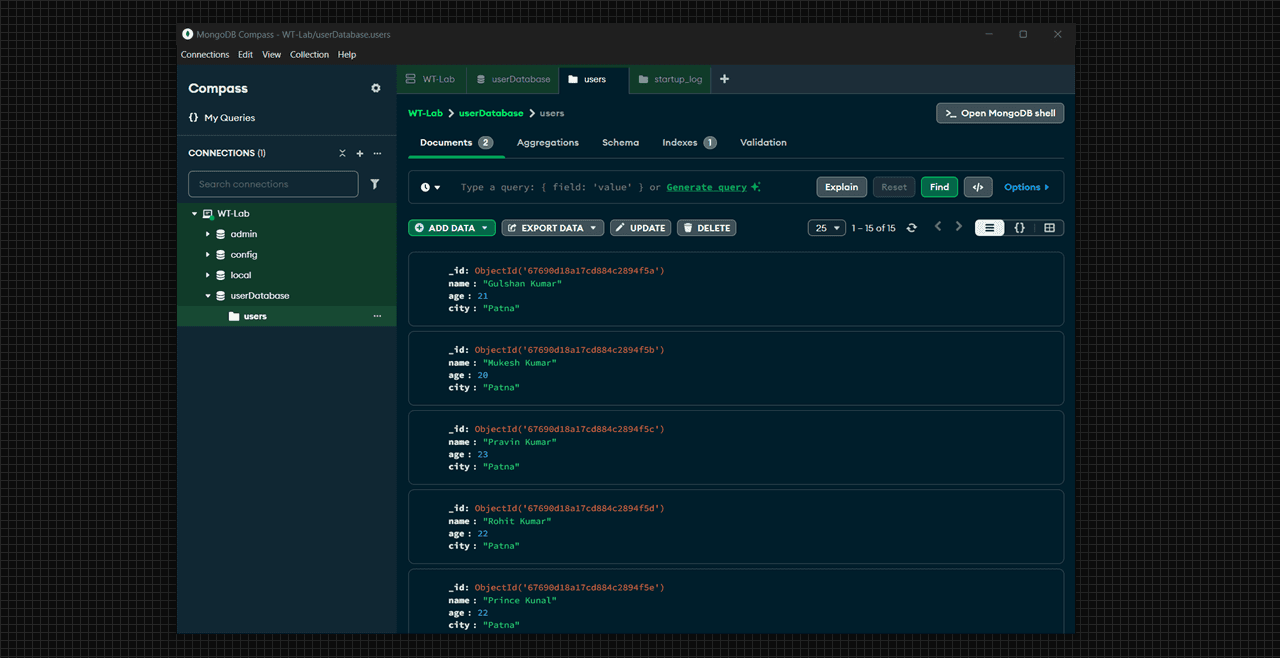
Data in Database: Data inserted in MongoDB userDatabase users collection.
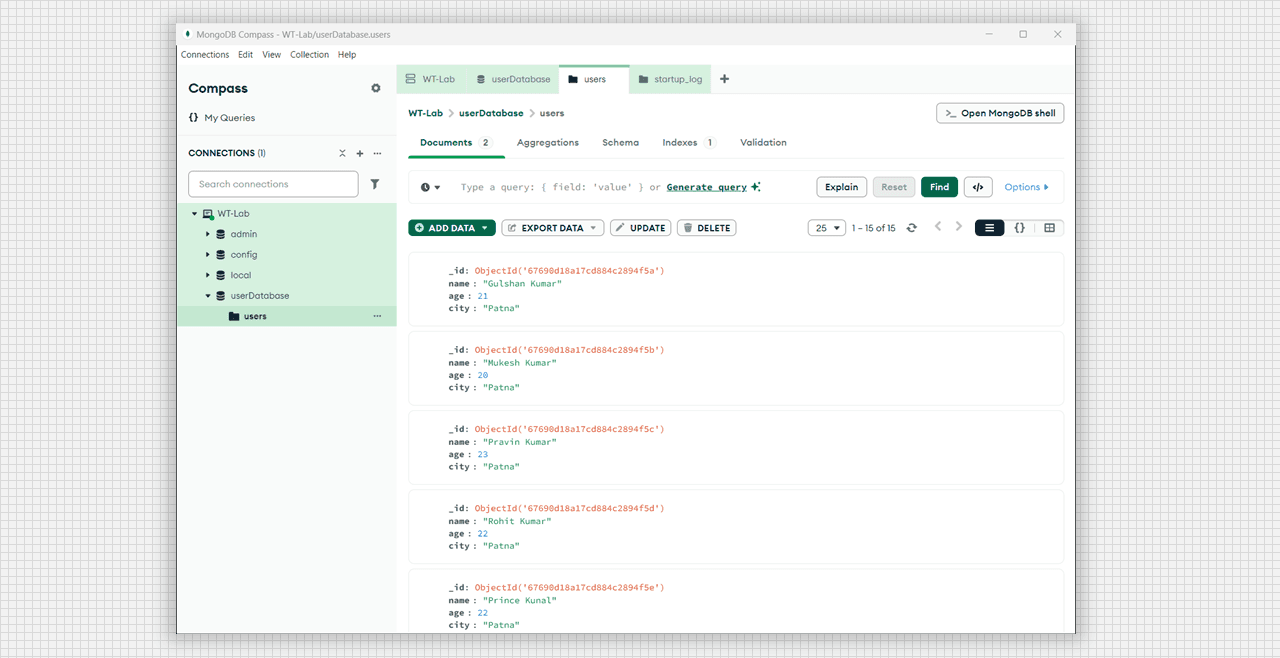
MongoDB userDatabase users in JSON formate.
User inserted successfully
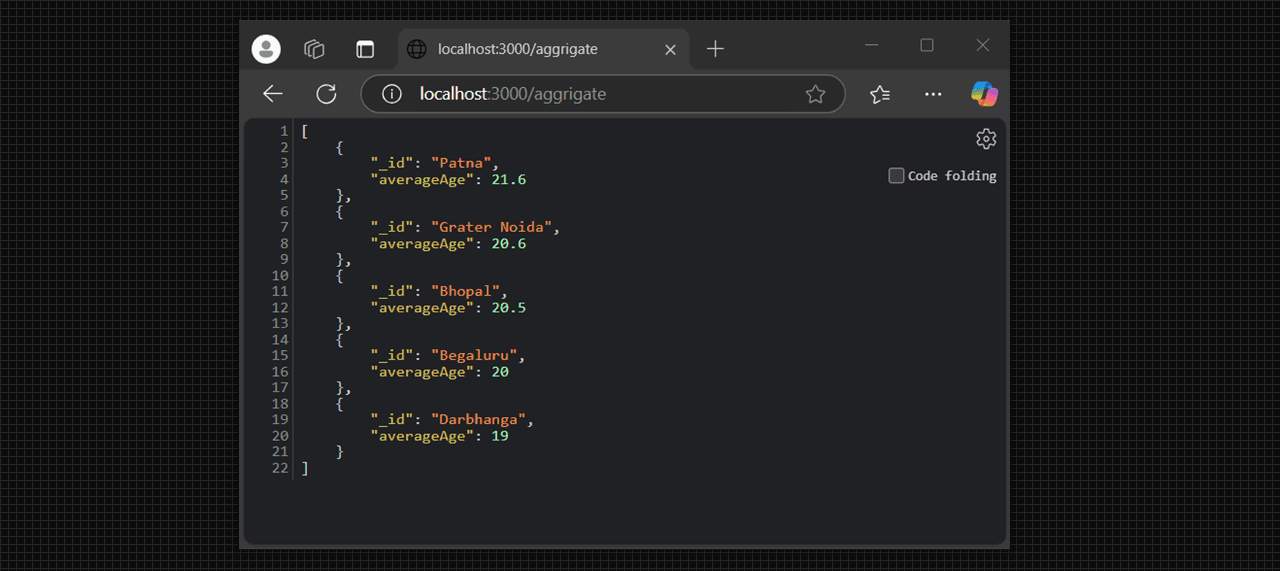
Average age of users in different cities:
City: Patna, Average Age: 21.6
City: Grater Noida, Average Age: 20.6
City: Bhopal, Average Age: 20.5
City: Begaluru, Average Age: 20
City: Darbhanga, Average Age: 19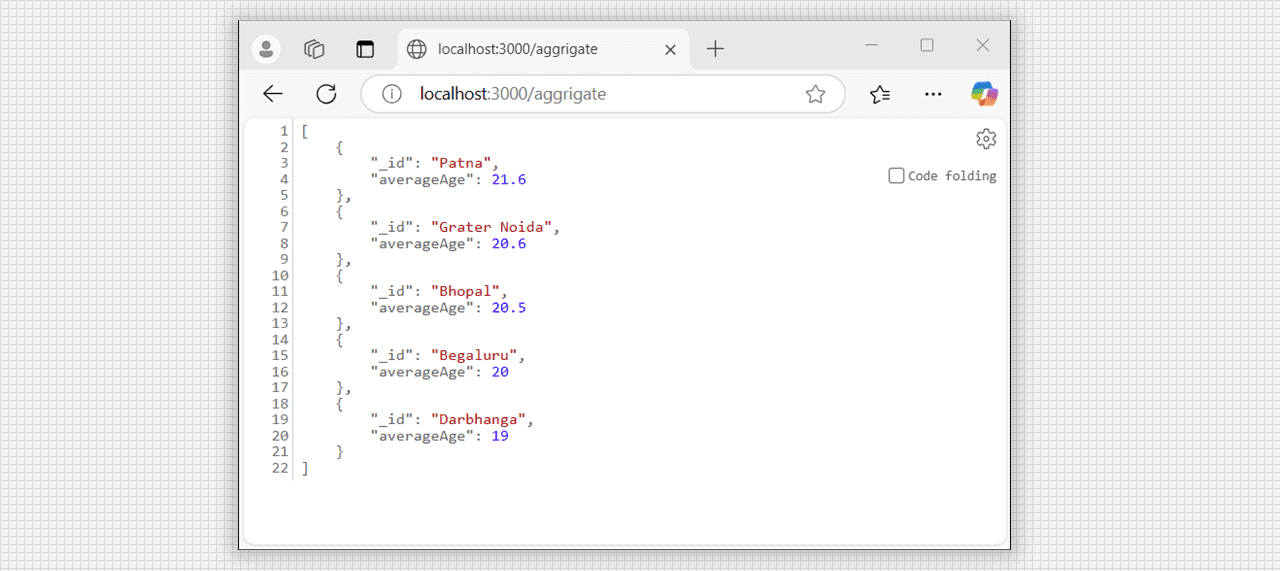
Aggrigate data output at http://localhost:3000/aggrigate
Objective: Create a table which should contain at least the following fields: name, password, email-id, phone number Write
Servlet/JSP to connect to that database and extract data from the tables and display them. Insert the details of the users
who register with the web site, whenever a new user clicks the submit button in the registration page
Theory:
JSP: JavaServer Pages (JSP) is a technology that helps software developers create dynamically generated web pages based on HTML, XML, or other document types.
Servlet: A servlet is a Java programming language class that is used to extend the capabilities of servers that host applications accessed by means of a request-response programming model.
Create table users in the database userdb with the following fields: name, password, email, phone.
create table users (
    id serial primary key,
    name varchar(50) not null,
    password varchar(50) not null,
    email varchar(50) not null,
    phone varchar(15) not null
);
Create a new project in Eclipse IDE and add the following files.
<%@ page language="java" contentType="text/html; charset=UTF-8" pageEncoding="UTF-8"%>
<!DOCTYPE html>
<html lang="en">
<head>
    <meta charset="UTF-8">
    <title>Home</title>
</head>
<body>
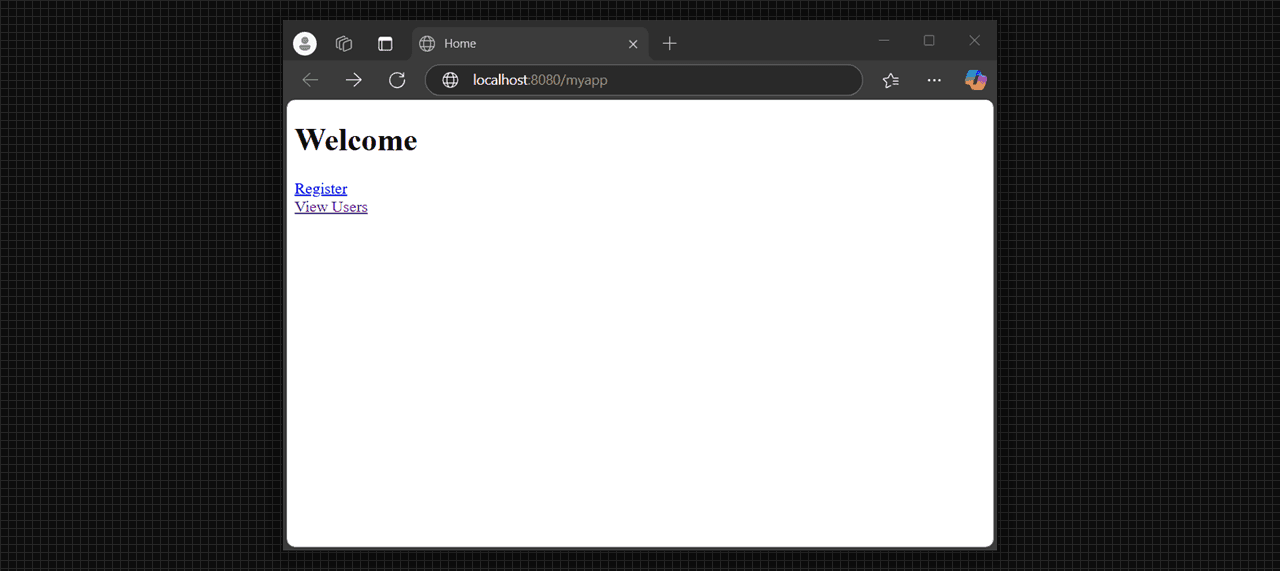
    <h1>Welcome</h1>
    <a href="jsp/register.jsp">Register</a><br>
    <a href="<%= request.getContextPath() %>/ViewUsersServlet">View Users</a>
</body>
</html>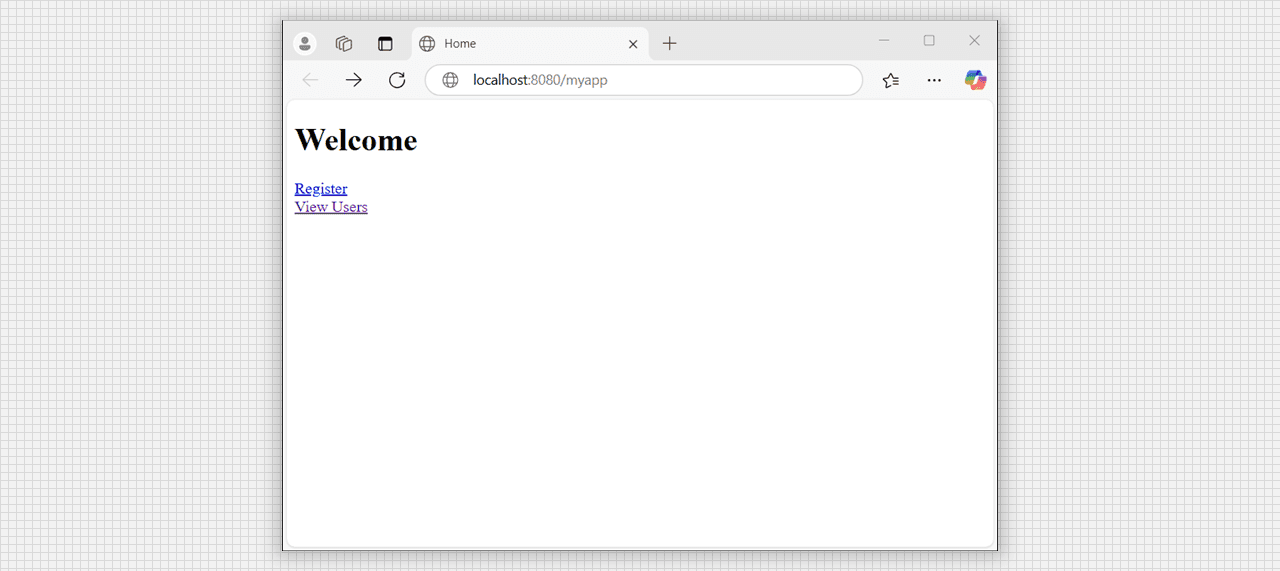
Home page or landing page with index.jsp output.
<%@ page language="java" contentType="text/html; charset=UTF-8" pageEncoding="UTF-8" %>
<!DOCTYPE html>
<html lang="en">

<head>
    <meta charset="UTF-8">
    <title>Register</title>
</head>

<body>
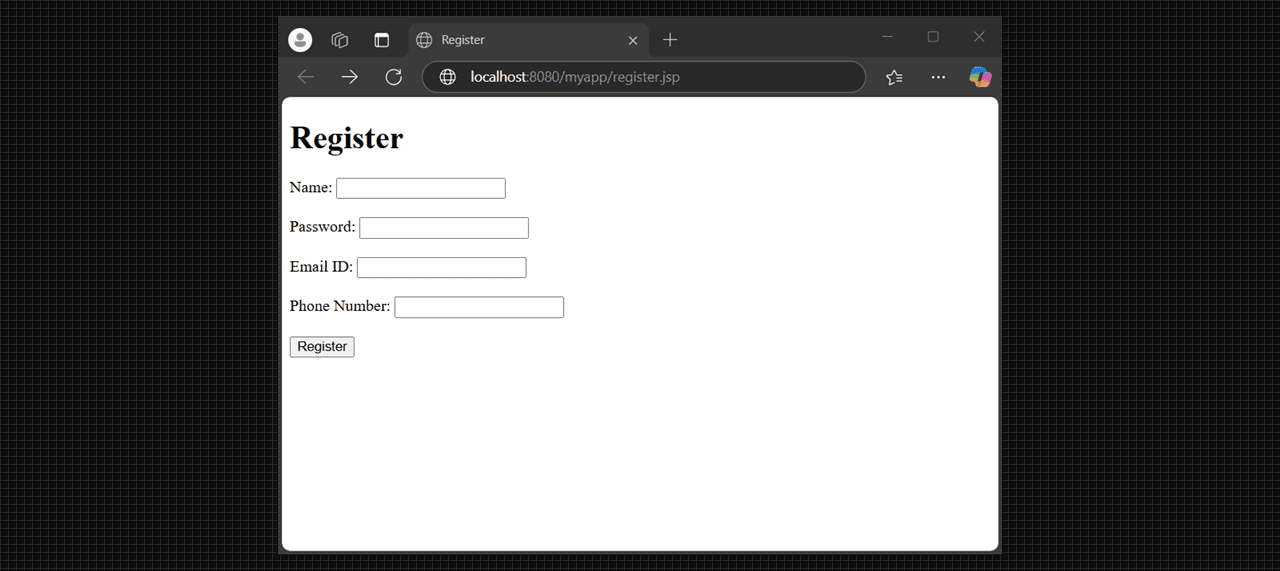
    <h1>Register</h1>
    <form method="post" action="<%= request.getContextPath() %>/RegisterServlet">
        <label for="name">Name:</label>
        <input type="text" id="name" name="name" required><br><br>
        <label for="password">Password:</label>
        <input type="password" id="password" name="password" required><br><br>
        <label for="email_id">Email ID:</label>
        <input type="email" id="email_id" name="email_id" required><br><br>
        <label for="phone_number">Phone Number:</label>
        <input type="text" id="phone_number" name="phone_number" required><br><br>
        <input type="submit" value="Register">
    </form>
</body>

</html>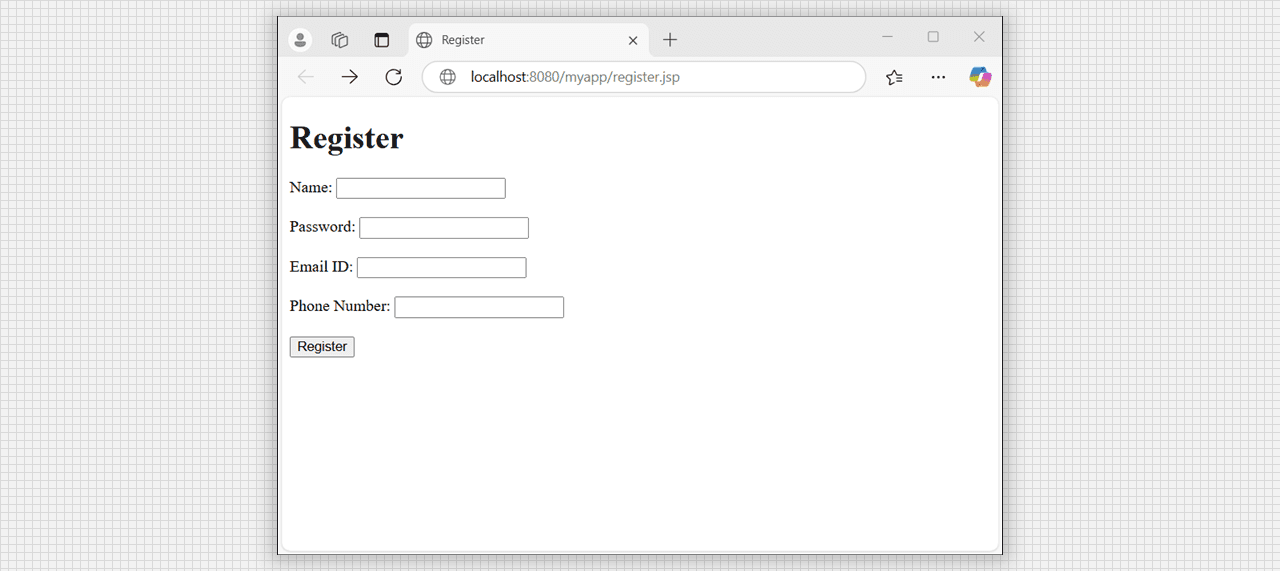
Registration form for new user with register.jsp output.
<%@ page language="java" contentType="text/html; charset=UTF-8" pageEncoding="UTF-8" %>
<%@ page import="java.util.List, com.example.User" %>
<!DOCTYPE html>
<html lang="en">

<head>
    <meta charset="UTF-8">
    <title>View Users</title>
</head>

<body>
    <h1>Registered Users</h1>
    <% List<User> users = (List<User>) request.getAttribute("users");
    if (users != null && !users.isEmpty()) {
    out.println("<table border='1'>");
        out.println("<tr>
            <th>Name</th>
            <th>Password</th>
            <th>Email ID</th>
            <th>Phone Number</th>
        </tr>");
        for (User user : users) {
        out.println("<tr>
            <td>" + user.getName() + "</td>
            <td>" + user.getPassword() + "</td>
            <td>" + user.getEmailId() + "</td>
            <td>" + user.getPhoneNumber() + "</td>
        </tr>");
        }
        out.println("</table>");
    } else {
    out.println("<p>No users registered.</p>");
    }
    %>
</body>

</html>package com.example;
public class User {
private String name;
private String password;
private String emailId;
private String phoneNumber;
public String getName() {
return name;
}
public void setName(String name) {
this.name = name;
}
public String getPassword() {
return password;
}
public void setPassword(String password) {
this.password = password;
}
public String getEmailId() {
return emailId;
}
public void setEmailId(String emailId) {
this.emailId = emailId;
}
public String getPhoneNumber() {
return phoneNumber;
}
public void setPhoneNumber(String phoneNumber) {
this.phoneNumber = phoneNumber;
}
}package com.example;
import java.io.IOException;
import java.sql.Connection;
import java.sql.DriverManager;
import java.sql.PreparedStatement;
import javax.servlet.ServletException;
import javax.servlet.annotation.WebServlet;
import javax.servlet.http.HttpServlet;
import javax.servlet.http.HttpServletRequest;
import javax.servlet.http.HttpServletResponse;
@WebServlet("/RegisterServlet")
public class RegisterServlet extends HttpServlet {
private static final long serialVersionUID = 1L;
protected void doPost(HttpServletRequest request, HttpServletResponse response) throws ServletException, IOException {
String name = request.getParameter("name");
String password = request.getParameter("password");
String email_id = request.getParameter("email_id");
String phone_number = request.getParameter("phone_number");
Connection conn = null;
PreparedStatement pstmt = null;
try {
Class.forName("org.postgresql.Driver");
conn = DriverManager.getConnection("jdbc:postgresql://localhost:5432/yourdbname", "yourUsername", "yourPassword");
String sql = "INSERT INTO users (name, password, email_id, phone_number) VALUES (?, ?, ?, ?)";
pstmt = conn.prepareStatement(sql);
pstmt.setString(1, name);
pstmt.setString(2, password);
pstmt.setString(3, email_id);
pstmt.setString(4, phone_number);
pstmt.executeUpdate();
response.getWriter().println("User registered successfully!");
} catch (Exception e) {
e.printStackTrace();
response.getWriter().println("Error: " + e.getMessage());
} finally {
try {
if (pstmt != null) {
pstmt.close();
}
if (conn != null) {
conn.close();
}
} catch (Exception e) {
e.printStackTrace();
}
}
}
}package com.example;
import java.io.IOException;
import java.sql.Connection;
import java.sql.DriverManager;
import java.sql.PreparedStatement;
import java.sql.ResultSet;
import java.util.ArrayList;
import java.util.List;
import javax.servlet.ServletException;
import javax.servlet.annotation.WebServlet;
import javax.servlet.http.HttpServlet;
import javax.servlet.http.HttpServletRequest;
import javax.servlet.http.HttpServletResponse;
@WebServlet("/ViewUsersServlet")
public class ViewUsersServlet extends HttpServlet {
private static final long serialVersionUID = 1L;
protected void doGet(HttpServletRequest request, HttpServletResponse response) throws ServletException, IOException {
Connection conn = null;
PreparedStatement pstmt = null;
ResultSet rs = null;
List<User> users = new ArrayList<>();
try {
Class.forName("org.postgresql.Driver");
conn = DriverManager.getConnection("jdbc:postgresql://localhost:5432/yourdbname", "yourUsername", "yourPassword");
String sql = "SELECT name, password, email_id, phone_number FROM users";
pstmt = conn.prepareStatement(sql);
rs = pstmt.executeQuery();
while (rs.next()) {
User user = new User();
user.setName(rs.getString("name"));
user.setPassword(rs.getString("password"));
user.setEmailId(rs.getString("email_id"));
user.setPhoneNumber(rs.getString("phone_number"));
users.add(user);
}
request.setAttribute("users", users);
request.getRequestDispatcher("/jsp/viewUsers.jsp").forward(request, response);
} catch (Exception e) {
e.printStackTrace();
response.getWriter().println("Error: " + e.getMessage());
} finally {
try {
if (rs != null) {
rs.close();
}
if (pstmt != null) {
pstmt.close();
}
if (conn != null) {
conn.close();
}
} catch (Exception e) {
e.printStackTrace();
}
}
}
}<?xml version="1.0" encoding="UTF-8"?>
<web-app xmlns:xsi="http://www.w3.org/2001/XMLSchema-instance"
xmlns="https://jakarta.ee/xml/ns/jakartaee"
xsi:schemaLocation="https://jakarta.ee/xml/ns/jakartaee
https://jakarta.ee/xml/ns/jakartaee/web-app_6_0.xsd"
id="WebApp_ID"
version="6.0">
<display-name>User Management Example</display-name>
<!-- RegisterServlet Configuration -->
<servlet>
<servlet-name>RegisterServlet</servlet-name>
<servlet-class>com.example.RegisterServlet</servlet-class>
</servlet>
<servlet-mapping>
<servlet-name>RegisterServlet</servlet-name>
<url-pattern>/RegisterServlet</url-pattern>
</servlet-mapping>
<!-- ViewUsersServlet Configuration -->
<servlet>
<servlet-name>ViewUsersServlet</servlet-name>
<servlet-class>com.example.ViewUsersServlet</servlet-class>
</servlet>
<servlet-mapping>
<servlet-name>ViewUsersServlet</servlet-name>
<url-pattern>/ViewUsersServlet</url-pattern>
</servlet-mapping>
</web-app>index.jsp: Home page with links to register and view users.register.jsp: Registration form for users to register with the website.view_users.jsp: Display the details of the registered users.User.java: User class with fieldsRegisterServlet.java: Servlet to insert user details into the database.ViewUsersServlet.java: Servlet to retrieve user details from the database and display them.web.xml: Configuration file for servlets.userdb.sql: SQL script to create the users table in the database.
Objective: Write a JSP which insert the details of the 3 or 4 users who register with the web site by using registration form. Authenticate the user when he submits the login form using the user name and password from the database.
Theory:
JavaServer Pages (JSP) is a technology used for creating dynamic web content. It allows embedding Java code directly into HTML pages. JSPs are primarily used for presenting data and collecting user input through forms.
- Embeds Java code within HTML using special tages.
- Facilitates the creation of dynamic, server-side web applicants.
- Integrates seamlessly with Java servlets.
Java Servlets are server-side Java components that handle client requests and generate responses. They run within a servlet container, such as Apache Tomcat, and are used to process or store data submitted from web forms, manage session state, control application flow, etc.
- Process client requests (HTTP GET, POST).
- Generate dynamic content.
- Interact with databases and other backend services.
- Maintain session management.
Create a new dynamic web project in Eclipse IDE and add the following files to the project. This will automatically create the all required files and folders in the project.
<%@ page language="java" contentType="text/html; charset=UTF-8" pageEncoding="UTF-8" %>
<%@ page import="java.sql.Connection, java.sql.DriverManager, java.sql.PreparedStatement, java.sql.SQLException" %>
<!DOCTYPE html>
<html lang="en">

    <head>
        <meta charset="UTF-8">
    <title>Register</title>
</head>

<body>
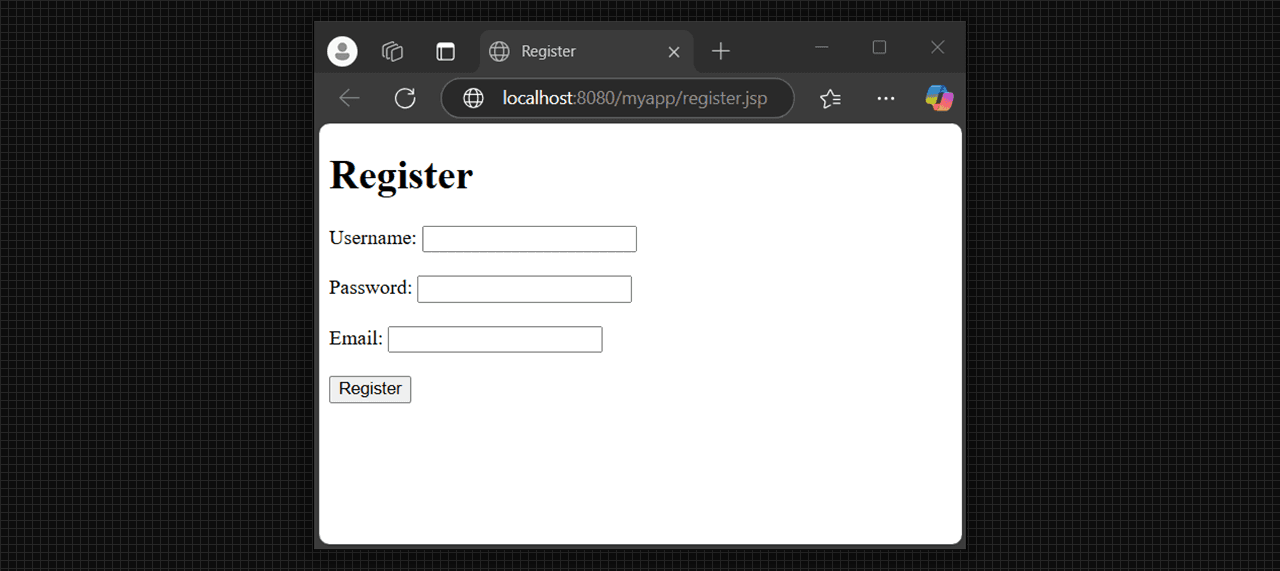
    <h1>Register</h1>
    <form method="post" action="<%= request.getContextPath() %>/RegisterServlet">
        <label for="username">Username:</label>
        <input type="text" id="username" name="username" required><br><br>
        <label for="password">Password:</label>
        <input type="password" id="password" name="password" required><br><br>
        <label for="email">Email:</label>
        <input type="email" id="email" name="email" required><br><br>
        <input type="submit" value="Register">
    </form>
</body>
</html>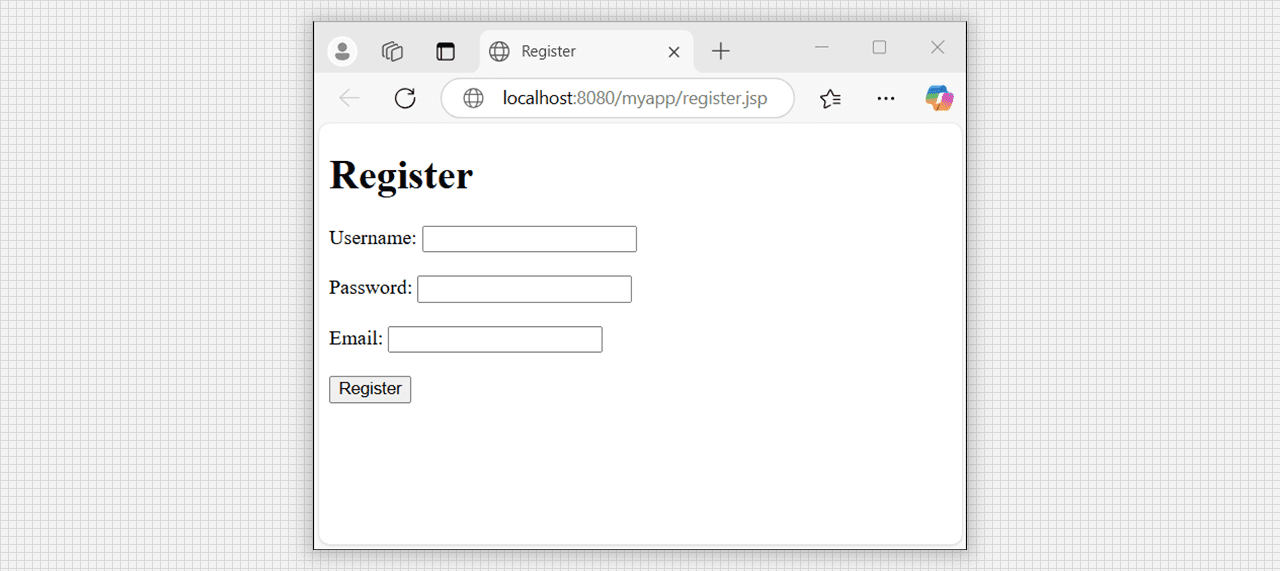
Registration form with register.jsp output.
<%@ page language="java" contentType="text/html; charset=UTF-8" pageEncoding="UTF-8" %>
<%@ page import="java.sql.Connection, java.sql.DriverManager, java.sql.PreparedStatement,
    java.sql.ResultSet, java.sql.SQLException" %>
<!DOCTYPE html>
<html lang="en">

    <head>
        <meta charset="UTF-8">
    <title>Login</title>
</head>

<body>
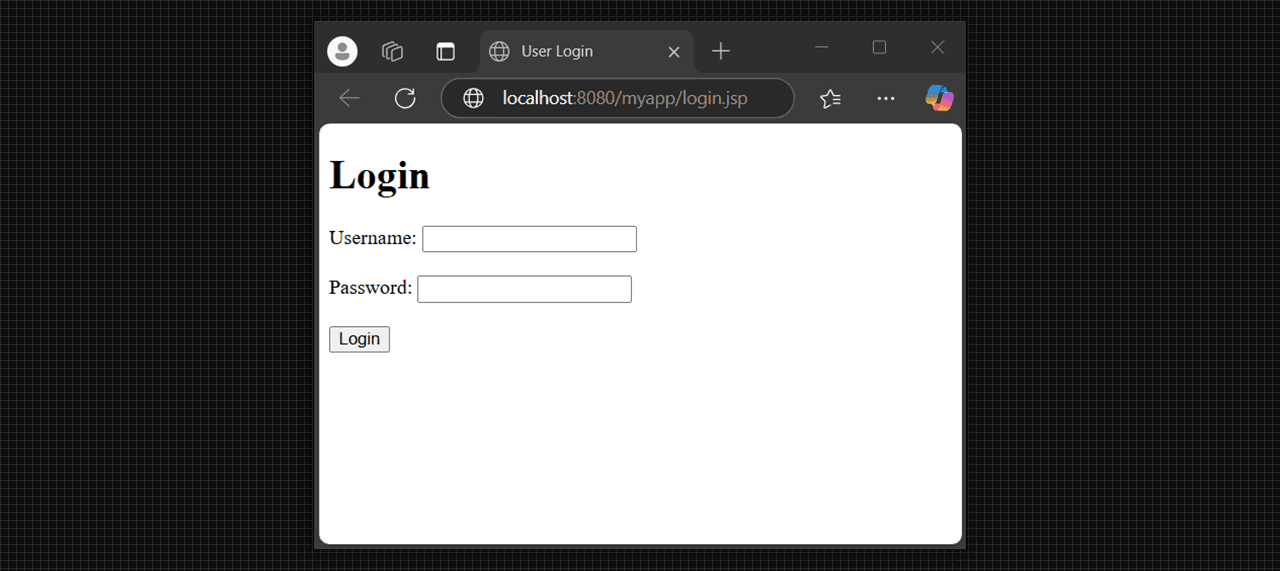
    <h1>Login</h1>
    <form method="post" action="<%= request.getContextPath() %>/LoginServlet">
        <label for="username">Username:</label>
        <input type="text" id="username" name="username" required><br><br>
        <label for="password">Password:</label>
        <input type="password" id="password" name="password" required><br><br>
        <input type="submit" value="Login">
    </form>
</body>
</html>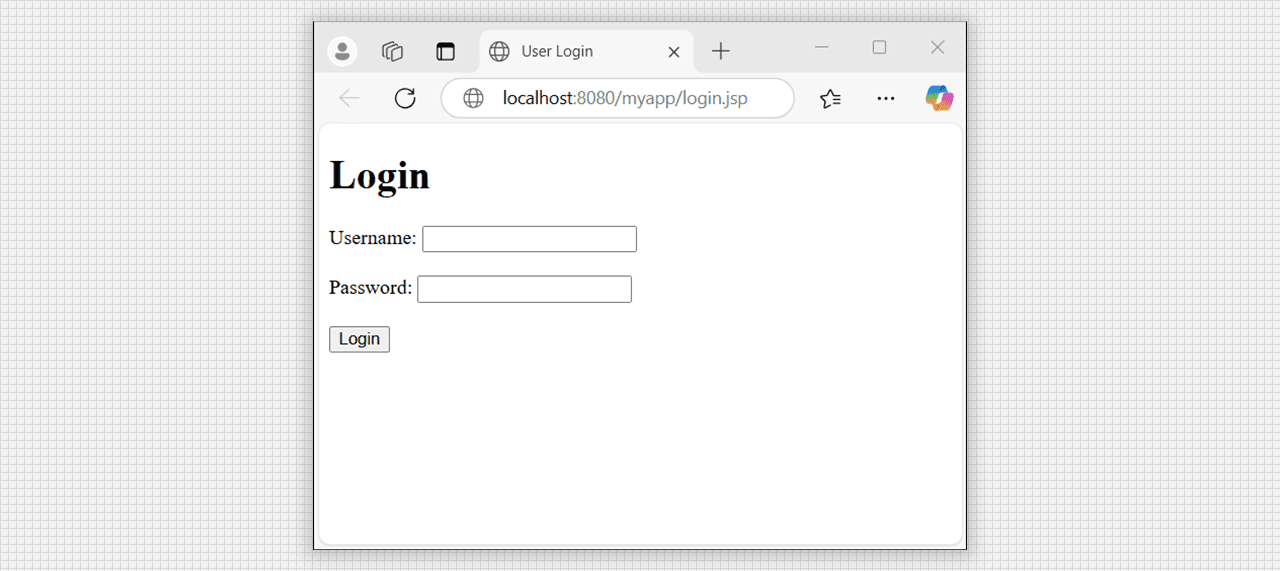
Login form with login.jsp output.
package com.example;

import java.io.IOException;
import java.sql.Connection;
import java.sql.DriverManager;
import java.sql.PreparedStatement;
import javax.servlet.ServletException;
import javax.servlet.annotation.WebServlet;
import javax.servlet.http.HttpServlet;
import javax.servlet.http.HttpServletRequest;
import javax.servlet.http.HttpServletResponse;

@WebServlet("/RegisterServlet")
public class RegisterServlet extends HttpServlet {

    private static final long serialVersionUID = 1L;

    protected void doPost(HttpServletRequest request, HttpServletResponse response)
    throws ServletException, IOException {
        String username = request.getParameter("username");
        String password = request.getParameter("password");
        String email = request.getParameter("email");

        Connection conn = null;
        PreparedStatement pstmt = null;

        try {
            Class.forName("org.postgresql.Driver");
            conn = DriverManager.getConnection("jdbc:postgresql://localhost:5432/userdb",
            "postgres", "1234567");

            String sql = "INSERT INTO users (username, password, email) VALUES (?, ?, ?)";
            pstmt = conn.prepareStatement(sql);
            pstmt.setString(1, username);
            pstmt.setString(2, password);
            pstmt.setString(3, email);
            pstmt.executeUpdate();

            response.getWriter().println("User registered successfully!");
        } catch (Exception e) {
            e.printStackTrace();
            response.getWriter().println("Error: " + e.getMessage());
        } finally {
            try {
                if (pstmt != null) {
                    pstmt.close();
                }
                if (conn != null) {
                    conn.close();
                }
            } catch (SQLException e) {
                e.printStackTrace();
            }
        }
    }
}package com.example;
import java.io.IOException;
import java.sql.Connection;
import java.sql.DriverManager;
import java.sql.PreparedStatement;
import java.sql.ResultSet;
import javax.servlet.ServletException;
import javax.servlet.annotation.WebServlet;
import javax.servlet.http.HttpServlet;
import javax.servlet.http.HttpServletRequest;
import javax.servlet.http.HttpServletResponse;
@WebServlet("/LoginServlet")
public class LoginServlet extends HttpServlet {
private static final long serialVersionUID = 1L;
protected void doPost(HttpServletRequest request, HttpServletResponse response)
throws ServletException, IOException {
String username = request.getParameter("username");
String password = request.getParameter("password");
Connection conn = null;
PreparedStatement pstmt = null;
ResultSet rs = null;
try {
Class.forName("org.postgresql.Driver");
conn = DriverManager.getConnection("jdbc:postgresql://localhost:5432/userdb",
"postgres", "1234567");
String sql = "SELECT * FROM users WHERE username = ? AND password = ?";
pstmt = conn.prepareStatement(sql);
pstmt.setString(1, username);
pstmt.setString(2, password);
rs = pstmt.executeQuery();
if (rs.next()) {
response.getWriter().println("User authenticated successfully!");
} else {
response.getWriter().println("Invalid username or password.");
}
} catch (Exception e) {
e.printStackTrace();
response.getWriter().println("Error: " + e.getMessage());
} finally {
try {
if (rs != null) {
rs.close();
}
if (pstmt != null) {
pstmt.close();
}
if (conn != null) {
conn.close();
}
} catch (SQLException e) {
e.printStackTrace();
}
}
}
}
<?xml version="1.0" encoding="UTF-8"?>
<web-app xmlns:xsi="http://www.w3.org/2001/XMLSchema-instance"
    xmlns="https://jakarta.ee/xml/ns/jakartaee"
    xsi:schemaLocation="https://jakarta.ee/xml/ns/jakartaee
    https://jakarta.ee/xml/ns/jakartaee/web-app_6_0.xsd"
    id="WebApp_ID"
    version="6.0">

    <display-name>User Registration and Login</display-name>

    <servlet>
        <servlet-name>RegisterServlet</servlet-name>
        <servlet-class>com.example.RegisterServlet</servlet-class>
    </servlet>

    <servlet-mapping>
        <servlet-name>RegisterServlet</servlet-name>
        <url-pattern>/RegisterServlet</url-pattern>
    </servlet-mapping>

    <servlet>
        <servlet-name>LoginServlet</servlet-name>
        <servlet-class>com.example.LoginServlet</servlet-class>
    </servlet>

    <servlet-mapping>
        <servlet-name>LoginServlet</servlet-name>
        <url-pattern>/LoginServlet</url-pattern>
    </servlet-mapping>

</web-app>register.jsp: Handles user registration.login.jsp: Handles user login.RegisterServlet.java: Processes registration from submission.LoginServlet.java: Processes login form submission.web.xml: Servlet mapping configuration.
□ □ □
